
Roasting is oven-based, dry-heat cooking done uncovered, and the single rule that separates a great roast from a disappointing one is this: dry surface, correct oven temperature, and always check internal temperature with an instant-read thermometer. Before you preheat anything, run through these three quick checks:
- Pan choice: Use a heavy rimmed sheet pan or roasting pan, not a thin disposable one.
- Oven temp: Set it to the temperature your recipe calls for and give it sufficient time to fully preheat.
- Thermometer: Have an instant-read thermometer within reach. The USDA/FSIS safe-temperature chart is clear: you cannot judge doneness by time or color alone.
Table of Contents
- The tools you actually need for roasting
- How to roast food: the step-by-step sequence
- How to roast meat: whole birds, beef, pork, and lamb
- How to roast vegetables for crispy, caramelized results
- USDA temperature targets and food safety rules
- Common beginner mistakes and how to fix them
- Why roasting is worth learning and when to use it
- Key Takeaways
- The skill that changes how you cook at home
- Adultingwithfood makes roasting less intimidating
- Useful sources and further reading
The tools you actually need for roasting
You do not need a fully stocked professional kitchen. You need a few items that genuinely affect the outcome, and you can skip the rest.
The non-negotiables:
- Heavy rimmed sheet pan or roasting pan: Thin pans warp at high heat and create hot spots. A heavy pan holds heat evenly and gives vegetables and meat a proper sear on the bottom. A stainless steel baking pan and rack set handles high-heat roasting without warping.
- Wire rack: Elevating meat off the pan floor lets hot air circulate underneath, which means even cooking and a crisper exterior. Check wire rack options if you need one.
- Instant-read thermometer: This is the single most important tool in your kitchen for roasting. It tells you exactly when food is safe and at its best.
- Oven thermometer: Most home ovens run 25°F–50°F hotter or cooler than the dial says. A $10 oven thermometer fixes that problem immediately.
- Tongs and a carving knife: Tongs let you flip and move food safely; a sharp carving knife makes clean slices without tearing.
Pro Tip: For an instant-read thermometer, look for one that reads in 2–3 seconds and is accurate to ±1°F. The Thermapen and ThermoPop from ThermoWorks are widely used by home cooks and professionals alike. Insert the probe into the thickest part of the meat, away from bone, for an accurate reading.
For a deeper look at what tools belong in a beginner's kitchen, the basic cooking tools guide covers everything you need to get started.
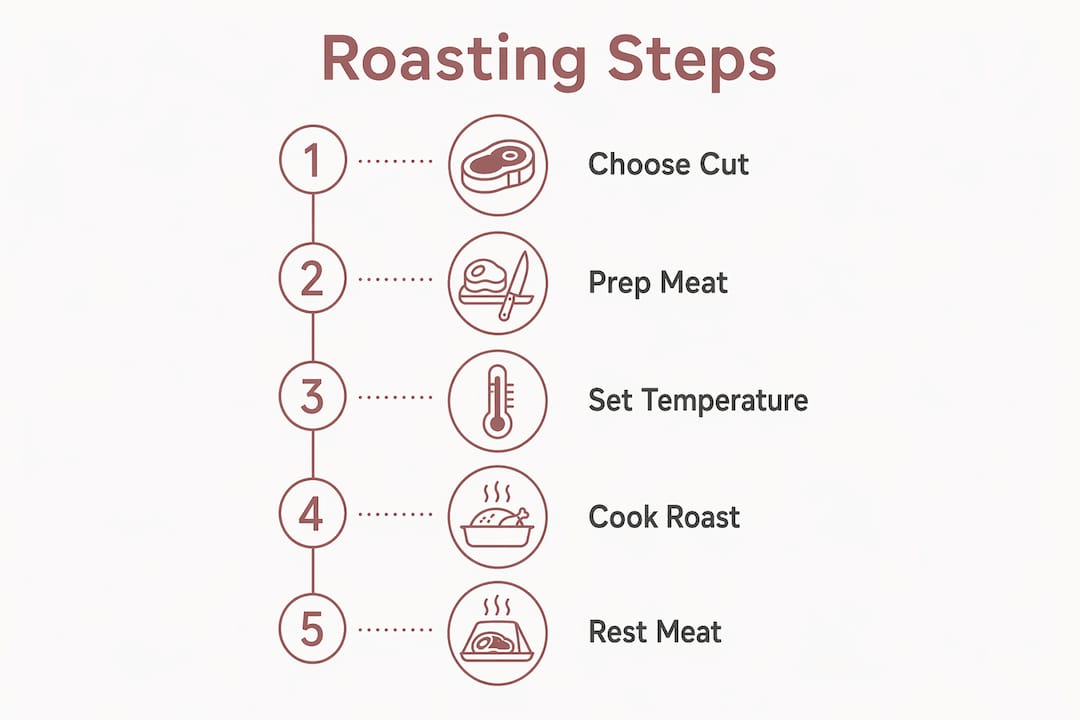
How to roast food: the step-by-step sequence
Every roasting recipe, whether it is a whole chicken or a tray of root vegetables, follows the same core sequence. Learn this once and you can apply it to almost anything.
- Preheat the oven and the pan. Set your oven to the target temperature and let it run for at least 15–20 minutes. If you are roasting vegetables, put the empty sheet pan in while the oven heats.
- Prep your food. Pat proteins completely dry with paper towels. Cut vegetables to a uniform size. Season everything well with salt, pepper, and any other spices.
- Arrange in a single layer. Place food on the rack or pan without crowding. Overlapping pieces steam instead of roast.
- Choose your temperature strategy. For large roasts, start high for browning then reduce to finish. For vegetables and smaller cuts, a steady high heat works throughout.
- Check internal temperature, not just time. Ovens vary, piece sizes vary, and timers are only a rough guide. Your thermometer is the real finish line.
- Rest before serving. Pull meat from the oven, tent loosely with foil, and let it rest. This step keeps juices in the meat instead of on your cutting board.
How to roast meat: whole birds, beef, pork, and lamb
Choosing the right cut
Roasting works best for tender, naturally fatty cuts that can handle dry heat without drying out. Whole chickens, beef rib roasts, pork loin, and leg of lamb are all ideal. Tough, collagen-heavy cuts like beef chuck or lamb shoulder do better braised in liquid.
Setting up the roast
Place your meat on a rack inside the roasting pan, fat-side up. The fat bastes the meat as it renders. No rack? Build an edible rack from halved onions, carrots, and celery. It elevates the roast, improves airflow, and flavors the drippings for a pan sauce.
The dual-temperature approach
Starting at a high temperature for several minutes builds a browned crust, then reducing to a moderate heat lets the interior cook through gently without drying out. This is the most reliable method for large roasts. For smaller cuts or spatchcocked chicken, a steady high heat throughout works well. Food & Wine's testing found that spatchcocking a chicken produces the crispiest, most evenly cooked bird and shortens cooking time compared with traditional whole roasting.
Internal temperature targets and resting times
| Cut | Pull temp (°F) | Final safe temp (°F) | Rest time |
|---|---|---|---|
| Whole chicken | 160°F–165°F (thigh) | 165°F | 10–15 min |
| Beef roast (medium-rare) | 125°F–130°F | 130°F–135°F | 15–30 min |
| Pork loin | 135°F–140°F | 145°F | 10–15 min |
| Leg of lamb (medium) | 130°F–135°F | 140°F | 15–20 min |
| Large beef roast | 125°F–130°F | 130°F–135°F | 30–45 min |
Pull the roast 5°F–15°F below your final target. Carryover cooking raises the internal temperature by about 5°F–15°F during the rest, depending on the size of the roast.
Roasting meat with vegetables
Add dense vegetables like potatoes and carrots to the pan in the last 45–60 minutes of cooking. Quick-cooking vegetables like asparagus or cherry tomatoes go in during the final 15–20 minutes. This way, nothing overcooks while the meat finishes.
How to roast vegetables for crispy, caramelized results
High heat is the key to great roasted vegetables. At 400°F–450°F, the surface moisture evaporates quickly and the Maillard reaction kicks in, producing those browned, slightly crispy edges that make roasted vegetables genuinely satisfying rather than just soft.
The setup rules:
- Cut everything to a uniform size so pieces cook at the same rate.
- Spread in a single, uncrowded layer. Crowding causes steaming, not browning.
- Toss with enough oil to coat lightly, not drench.
- for even browning, but leave undisturbed for the first 10 minutes to let a crust form.
Pro Tip: Preheat your empty sheet pan in the oven before adding vegetables. The hot metal jump-starts caramelization the moment the vegetables hit the surface. Also, skip parchment paper when you want maximum crispness. Serious Eats testing found that bare metal or foil browned vegetables more effectively than parchment in side-by-side tests.
Roasting times for common vegetables at 425°F
| Vegetable | Cut size | Approximate time |
|---|---|---|
| Potatoes | 1-inch cubes | — |
| Sweet potatoes | 1-inch cubes | — |
| Carrots | ½-inch rounds | 25–30 min |
| Broccoli | medium florets | 20–25 min |
| Brussels sprouts | halved | 25–30 min |
| Asparagus | whole spears | — |
| Cherry tomatoes | whole | 15–20 min |
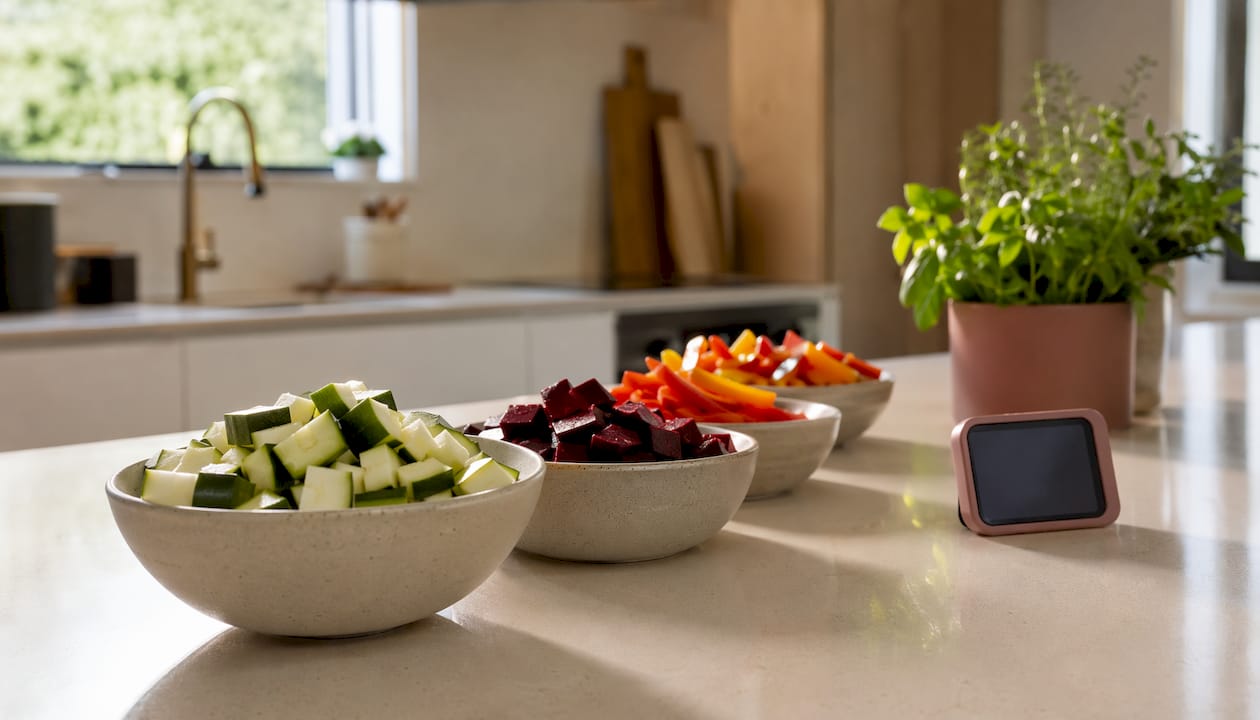
Roasted vegetables make an easy, satisfying side that holds up well as a healthy alternative to processed snacks and works just as well for meal prep as it does for a weeknight dinner.
USDA temperature targets and food safety rules
The USDA/FSIS safe minimum internal temperatures are not suggestions. They are the standard every home cook in the U.S. should follow.
| Food | Safe minimum internal temp | Notes |
|---|---|---|
| Poultry (whole or ground) | 165°F | Check thigh and breast separately |
| Beef, pork, lamb (whole cuts) | 145°F | Followed by a 3-minute rest |
| Ground beef or pork | 160°F | No rest required |
| Fish and shellfish | 145°F | Flesh should be opaque |
Why temperature beats time every time: Oven temperatures vary, piece sizes vary, and starting temperatures vary. A timer tells you when to check; a thermometer tells you when you are done. Home cooks who rely on timers rather than thermometers are the ones who end up with undercooked chicken or dried-out pork. The FoodSafety.gov safe minimum internal temperatures page is a reliable quick reference to bookmark.
Safe handling checklist:
- Wash hands and surfaces before and after handling raw meat.
- Never use the same cutting board for raw meat and ready-to-eat foods.
- Refrigerate leftovers within 2 hours of cooking.
- Reheat leftovers to 165°F before eating.
Common beginner mistakes and how to fix them
Most roasting problems come down to three things: too much moisture, too much crowding, and trusting the timer over the thermometer.
Diagnostic checklist:
- Soggy vegetables: Pan was overcrowded or oven temp was too low. Fix: use a larger pan, roast in batches, and raise the heat to at least 400°F.
- Grey, steamed-looking meat: Surface was wet when it went into the oven, or the oven was not hot enough. Fix: pat meat completely dry and preheat the oven fully before the food goes in.
- Dry, overcooked meat: Cooked past the target temperature or skipped resting. Fix: pull at the correct internal temperature and rest before carving.
- Uneven browning: Oven has hot spots, or food was not flipped. Fix: rotate the pan halfway through cooking and flip food once.
Oven calibration: Place an oven thermometer in the center of your oven, set the dial to 350°F, and check after 20 minutes. If the reading is off by more than 25°F, adjust your dial accordingly every time you cook.
Pro Tip: Large roasts keep cooking after you pull them from the oven. A 15–30 minute rest can raise the internal temperature by 5°F–15°F depending on the size of the roast. Pull your meat slightly below the final target temperature and let carryover do the rest.
Why roasting is worth learning and when to use it
Roasting is one of the most hands-off cooking methods you can use. Once the food is in the oven, you have time to prep a salad, set the table, or simply wait. That makes it practical for both weeknight dinners and weekend cooking for a group.
What roasting adds that other methods do not: a browned, slightly crispy exterior from the Maillard reaction, concentrated flavor as moisture evaporates, and the ability to cook large items evenly without constant attention. A whole chicken, a beef roast, or a full sheet pan of root vegetables would be difficult to achieve on a stovetop.
When roasting is the right choice:
- Whole birds, large center-cut roasts, and bone-in cuts with natural fat.
- Dense root vegetables and brassicas that benefit from caramelization.
- Meal prep batches of vegetables or proteins for the week.
When to choose something else: Thin cutlets and delicate fish cook faster and more evenly in a skillet. Tough, collagen-heavy cuts like short ribs or lamb shoulder need moist heat (braising) to become tender. Roasting those cuts produces dry, chewy results. For a quick weeknight option, fast 30-minute meals that use roasted vegetables as a base are a practical starting point.
Key Takeaways
Roasting successfully every time comes down to dry surfaces, correct heat, and checking internal temperature rather than guessing by time.
| Point | Details |
|---|---|
| Dry surface first | Pat meat and vegetables dry before seasoning to get browning, not steaming. |
| Preheat pan and oven | A fully preheated oven and hot pan jump-start caramelization from the first minute. |
| Single layer, no crowding | Overlapping food steams instead of roasts; use a larger pan or cook in batches. |
| Check internal temperature | Pull meat at 5°F–15°F below the final USDA minimums and rest; the USDA minimum is 145°F for beef and pork (with a 3-minute rest) and 165°F for poultry. |
| Adultingwithfood | Provides step-by-step roasting recipes, grocery checklists, and chef support to help beginners build real kitchen confidence. |
The skill that changes how you cook at home
Roasting is the technique I point beginners to first, and the reason is simple: it teaches you to trust a process rather than a recipe. Once you understand dry heat, temperature targets, and resting, you can apply that knowledge to almost any protein or vegetable without needing to look up a new recipe every time.
What most guides skip is the confidence gap. Knowing the steps is one thing. Actually pulling a whole chicken out of the oven, checking the thermometer, and trusting that it is done, that takes practice. The cooks who improve fastest are the ones who roast something every week, not just on holidays.
The conventional wisdom says to follow the recipe exactly. My take: learn the underlying rules (dry surface, right temperature, check with a thermometer, rest the meat) and the recipe becomes a suggestion rather than a script. That shift is where real kitchen confidence starts.
Adultingwithfood makes roasting less intimidating
You now have the framework. The next step is putting it into practice with recipes that are built for beginners, not professional chefs.

Adultingwithfood is a digital cooking membership that gives you a Starter Pack with kitchen setup guidance, weekly recipe drops with 5 new recipes, grocery store checklists, and real chef support when you have questions. Every recipe is designed to build a specific skill, and roasting is one of the first things members tackle. You get the recipe, the grocery list, and a chef in your corner if something goes wrong.
If you want to understand what the membership includes before signing up, the about page walks through exactly what members receive and how the support works. The goal is simple: fewer drive-thru runs, more meals you are proud of.
Useful sources and further reading
These are the primary references behind this guide. Each one is worth bookmarking.
- USDA/FSIS Safe Temperature Chart: The official U.S. government source for safe minimum internal temperatures for all meats. Use this as your definitive reference for food safety.
- FoodSafety.gov Meat and Poultry Charts: Detailed roasting time and temperature charts for a wide range of cuts, organized by weight and type.
- Serious Eats: 5 Tricks for Golden, Crispy Roasted Vegetables: Test-based guidance on pan selection, parchment vs. bare metal, and spacing for the best vegetable results.
- Food & Wine: The Best Way to Roast a Chicken: Side-by-side testing of whole roast, spatchcock, and trussed methods with pull temperatures and timing.
- Reluctant Gourmet: Roasting Technique: A practical primer on dual-temperature roasting, pull temps, and resting guidance for home cooks.
- Adultingwithfood: Basic Cooking Tools Guide: Beginner-focused breakdown of the tools that actually matter in a home kitchen, including thermometers and sheet pans.