
You can confidently use an air fryer today by following three simple rules: space your food, use a little oil, and check early. That's the whole foundation. Everything else in this guide builds on those three ideas.
Before you cook anything, run through this quick checklist:
- Power: Plug into a dedicated outlet, not a power strip.
- Placement: Set the unit on a heat-resistant surface with at least 5 inches of clearance on all sides.
- Basket: Rinse and dry the basket before first use.
Three rules to keep close as you start:
- Do arrange food in a single layer with space between pieces.
- Do use a light coating of oil, applied sparingly to the food itself.
- Don't use wet batters or aerosol cooking sprays.
Forgiving foods like fries, vegetables, and small chicken pieces are the best place to start because they teach you how your unit handles heat and timing without wasting expensive ingredients.
Key Takeaways
An air fryer works best when you treat it like a compact convection oven: space food properly, use a light oil coating, and check for doneness earlier than you would in a standard oven.
| Point | Details |
|---|---|
| Space food in a single layer | Leave roughly 1/2 inch between pieces so hot air circulates and food crisps instead of steams. |
| Use a light oil coating | Around 1 tablespoon or less per small batch gives a golden exterior without excess grease. |
| Avoid wet batters and aerosol sprays | Wet batter drips and smokes; aerosol sprays degrade nonstick coatings over time. |
| Convert oven recipes by reducing temp and time | Drop temperature by 25°F and cut cooking time by about 20%, then check early. |
| Follow the 7-day practice plan | One focused cook per day builds the habits and calibration that make every future meal easier. |
| AdultingintheKitchen Starter Pack | Provides weekly beginner recipes, grocery checklists, and chef support to keep you cooking confidently. |
Table of Contents
- Air fryer recipes for beginners: five foods to try first
- Essential tips every beginner needs before their first cook
- What not to cook and why beginners often fail
- How an air fryer works and a quick time/temperature guide
- How to clean your air fryer and keep it performing well
- A 7-day practice plan to build real confidence
- Troubleshooting common problems and food safety basics
- Why starting small is the smartest move you can make
- Ready for guided recipes and real chef support?
- Sources
Air fryer recipes for beginners: five foods to try first
The goal on day one is a quick win, not a perfect meal. These five foods are forgiving, fast, and teach you something useful about how your air fryer behaves.
Frozen french fries
Temperature: 400°F | Time: 14–18 minutes
Shake the basket halfway through. Frozen fries are the single best first cook because the result is almost impossible to ruin. They teach you the shake-and-check habit that carries into every other recipe.
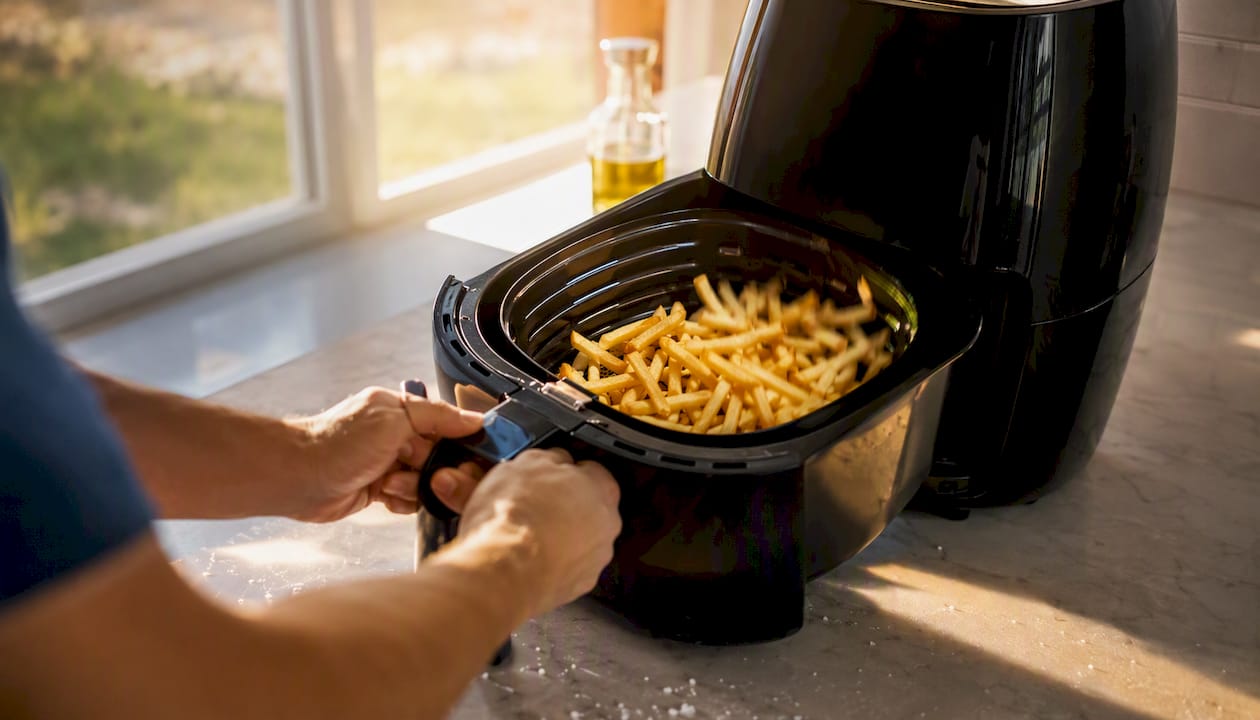
Pro Tip: Don't thaw them first. Straight from the freezer into the basket gives you a crispier result.
Roasted vegetables
Temperature: medium heat | Time: around 10 to 15 minutes
Cut vegetables into similar-sized pieces so they finish at the same time. Broccoli, zucchini, bell pepper, and asparagus all work well. Toss them in a teaspoon of olive oil and a pinch of salt before they go in.
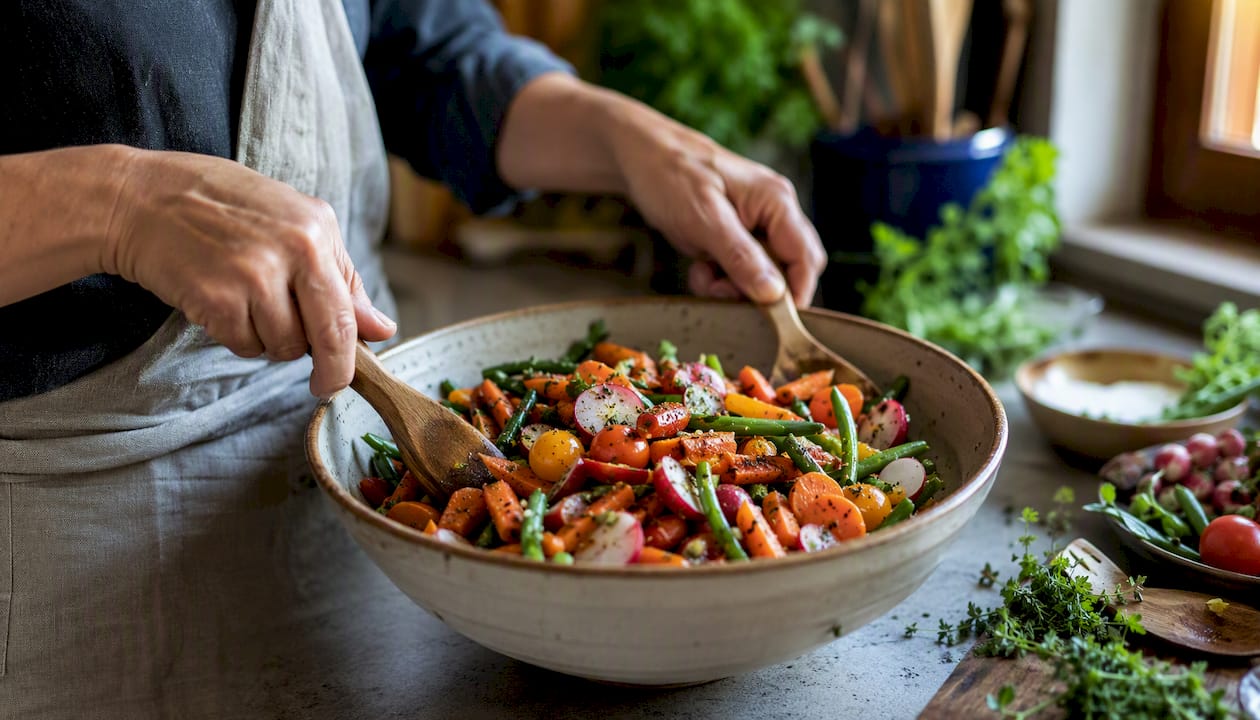
Pro Tip: Pat vegetables dry with a paper towel before oiling them. Moisture is the enemy of crispiness.
Chicken nuggets or small chicken pieces
Temperature: moderate heat | Time: about 10–12 minutes for nuggets, somewhat longer for bone-in pieces
Flip halfway through. Nuggets are nearly foolproof. For raw chicken pieces, always confirm doneness with a thermometer (165°F internal). This cook teaches you the difference between reheating and cooking raw protein.
Salmon fillet or fish sticks
Temperature: moderate to high heat | Time: around 8–10 minutes for a fillet, somewhat longer for fish sticks
Salmon is one of the most forgiving proteins in an air fryer. It cooks quickly, stays moist, and the skin crisps up in a way that's hard to achieve on a stovetop without practice.
Pro Tip: Brush the fillet with a thin layer of olive oil and season before cooking. Skip the parchment unless your model's manual recommends it.
Toasted sandwich or quesadilla
Temperature: moderate heat | Time: about 5–8 minutes
A quesadilla or grilled cheese in the air fryer comes out with a genuinely crispy exterior. Use a small piece of foil folded up at the edges to keep the filling contained, and flip once at the halfway mark. This cook teaches you how to handle flat, layered foods.
Essential tips every beginner needs before their first cook
These aren't optional refinements. They're the difference between soggy and crispy, between a frustrating first week and a confident one.
1. Preheat for 2–3 minutes
Most air fryers preheat in just a few minutes, and skipping that step means your food starts cooking in a cold environment. The result is uneven browning and longer cook times. Treat it like preheating an oven: non-negotiable.
2. Never overcrowd the basket
Overcrowding is the most common reason beginners don't get crispy results. Food needs to be in a single layer with roughly 1/2 inch of space between pieces. When pieces are stacked, the fan circulates steam instead of dry heat, and you end up with something closer to a steamed dish than a roasted one. Cook in batches when needed.
3. Use a light coating of oil
Air fryers are not zero-oil appliances. Around 1 tablespoon or less for a typical small batch is enough to get a crispy, golden exterior. The goal is a thin, even coat on the food itself, not pooled oil in the basket. A manual oil mister gives you the most control.
Oil and smoke points: At high air-fryer temperatures (375–400°F), use oils with a smoke point above 400°F. Avocado oil (520°F), refined coconut oil (450°F), and light olive oil (465°F) are reliable choices. Extra-virgin olive oil smokes around 375°F, so use it only at lower settings or as a finishing drizzle.
4. Flip or shake mid-cook
The heating element sits above the basket in most models. Without flipping or shaking, the top of your food crisps while the bottom stays pale. Set a halfway timer as a habit from your very first cook.
5. Adjust conventional oven recipes
Treating your air fryer as a compact convection oven is the mental model that unlocks every recipe you already know. A chicken breast that takes 30 minutes at 400°F in a conventional oven will likely be done in 18–22 minutes at 375°F in an air fryer.
Pro Tip: Think of your air fryer as a very small, very fast convection oven. That framing means you can adapt almost any roasting or baking recipe you already trust, rather than searching for "air fryer-only" versions.
What not to cook and why beginners often fail
Knowing what to skip saves you a messy basket and a frustrating result. A few categories genuinely don't work in an air fryer, and understanding why helps you adapt rather than just avoid.
- Wet-battered foods (beer batter, tempura): The batter drips before it sets, lands on the heating element, and smokes. Use panko breadcrumbs with an egg wash instead. You get a similar crunch with none of the mess.
- Loose cheese: Shredded cheese placed directly on food can fly into the heating element from the fan's airflow. Add cheese in the last 1–2 minutes of cooking, or use a slice rather than shreds.
- Oversized roasts or whole birds: A large roast blocks airflow around the food, which means the outside browns while the inside stays undercooked. Items that don't fit with clearance on all sides belong in the oven.
- Delicate leafy greens: Spinach, kale chips, and similar items are light enough to be pulled toward the heating element by the fan. If you want to try kale chips, anchor them under a heavier piece of food or use a rack insert.
- Very wet or saucy foods: Dishes with a lot of liquid sauce steam rather than crisp. Finish with sauce after cooking, or use a thick glaze applied in the last two minutes.
The workaround for most of these is simple: change the coating, reduce the portion size, or finish the step outside the air fryer. The appliance isn't limited so much as it's specific.
How an air fryer works and a quick time/temperature guide
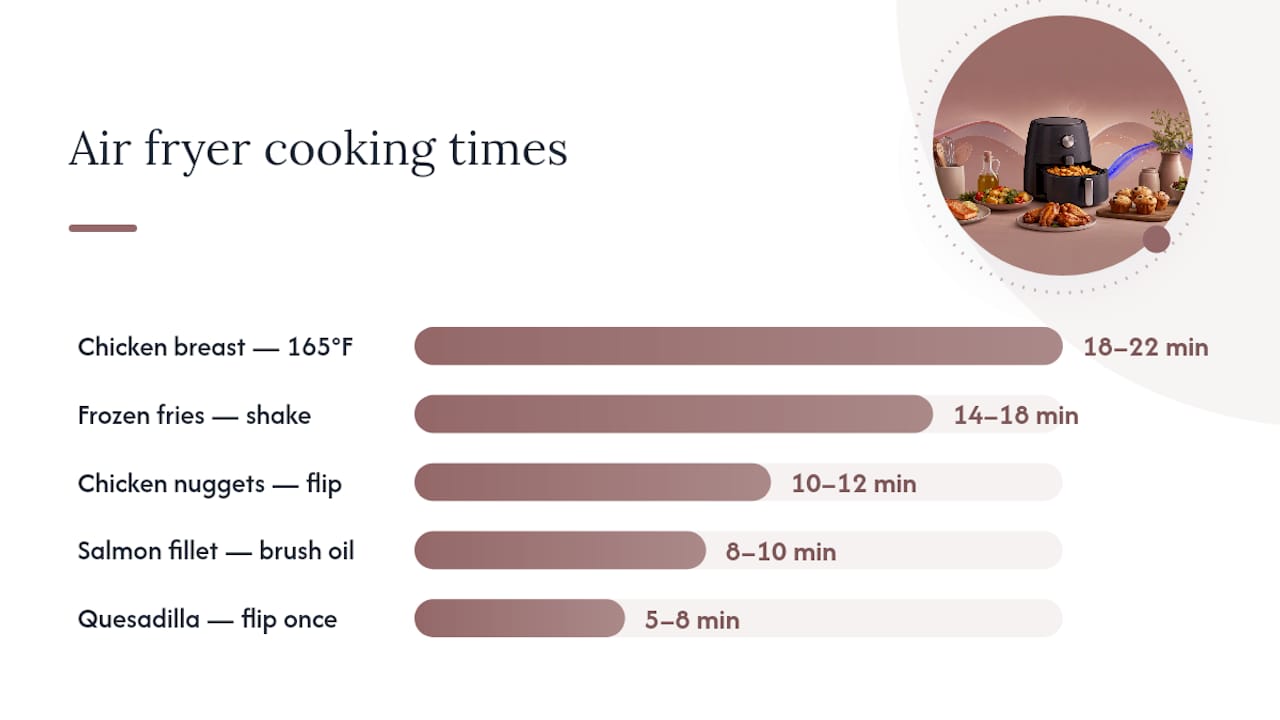
An air fryer is essentially a compact convection oven with a heating element and a powerful fan positioned close to the food. Most models reach high temperatures suitable for cooking flavorful, crispy food, and that concentrated heat circulates rapidly around the basket. The result is faster browning and crispiness compared to a standard oven, which is why cook times are shorter and why checking early matters.
When you convert an oven recipe, the practical rule is to reduce temperature by about 25°F and cooking time by about 20%, then check for doneness a few minutes before the adjusted time is up. Your first attempt is a calibration run. Note what you see, adjust, and the second cook is almost always better.
| Food | Temperature | Time | Quick Note |
|---|---|---|---|
| Frozen french fries | 400°F | 14–18 min | Shake at halfway mark |
| Chicken breast (boneless) | 375°F | 18–22 min | Check at 165°F internal |
| Salmon fillet | 400°F | 8–10 min | Brush with oil first |
| Broccoli florets | 375°F | 8–12 min | Pat dry before oiling |
| Chicken nuggets (frozen) | 375°F | 10–12 min | Flip halfway |
| Fish sticks (frozen) | 400°F | 10–12 min | No thawing needed |
| Quesadilla | 370°F | 5–8 min | Flip once at halfway |
| Asparagus | 400°F | 6–8 min | Single layer only |
For a deeper look at how roasting temperatures translate across cooking methods, the roasting technique guide on AdultingintheKitchen's blog walks through the same convection principles in a conventional oven context.
How to clean your air fryer and keep it performing well
Clean the basket after every single use. That's the one rule that prevents most smoke issues and extends the life of the nonstick coating.
Routine cleaning (after every cook):
- Unplug the unit and let it cool completely before handling the basket.
- Remove the basket and tray, wash with warm soapy water and a soft sponge. Most baskets are dishwasher-safe, but check your manual.
- Wipe the interior of the unit with a damp cloth. Never submerge the main unit.
- Empty and wipe the drip tray. Grease buildup there is the most common cause of smoke.
Deep cleaning (every few weeks or when you notice residue):
Soak the basket in hot soapy water for 10–15 minutes to loosen baked-on residue. Use a soft brush, not steel wool or abrasive pads, which scratch the nonstick surface. Use silicone or wooden tools when handling food in the basket for the same reason.
Aerosol sprays damage nonstick coatings. The propellants in canned cooking sprays like PAM build up on the basket surface over time and degrade the coating. Use a manual oil mister or rub oil directly onto the food instead.
If your air fryer smokes:
- Check the drip tray first. Excess grease pooling there is the most common culprit.
- Reduce the temperature slightly. High-fat foods like bacon or sausage smoke more at 400°F than at 370°F.
- Add a small amount of water (1–2 tablespoons) to the drip tray when cooking fatty foods to prevent grease from burning.
- Ventilate the kitchen. Turn on the range hood or open a window.
Pro Tip: Clean the basket while it's still slightly warm (not hot). Residue releases more easily than when it's fully cooled and set.
A 7-day practice plan to build real confidence
Seven days, one focus per day. By the end of the week, you'll have cooked every major food category and learned how your specific model behaves.
Grocery starter list:
- Frozen french fries (one bag)
- Small chicken pieces (bone-in thighs or drumsticks, or boneless breasts)
- One firm vegetable: broccoli, zucchini, or bell pepper
- One salmon fillet or a box of fish sticks
- Flour tortillas or bread for a quesadilla or grilled cheese
- Olive oil or avocado oil
- Basic seasonings: salt, pepper, garlic powder
The 7-day plan:
- Day 1: Unbox, rinse the basket, do a 5-minute empty preheat run to burn off any factory residue. Read your model's manual for capacity and preset options.
- Day 2: Cook frozen french fries. Practice the shake-and-check habit. Note the color at the halfway mark.
- Day 3: Roast your chosen vegetable. Pat it dry, toss in a teaspoon of oil, season, and cook in a single layer.
- Day 4: Cook a salmon fillet or fish sticks. This is your first protein cook. Use a thermometer to check doneness (145°F for fish).
- Day 5: Cook a small chicken piece. Bone-in thighs are forgiving. Check at 165°F internal. This is the most important safety cook of the week.
- Day 6: Reheat last night's leftovers. Air fryers restore crispy textures far better than a microwave. Try 350°F for 3–5 minutes and check.
- Day 7: Combine a small meal: roasted vegetables and a protein together. Cook them in separate batches if needed, then serve together.
Pro Tip: Pick up an instant-read thermometer before Day 5. It removes all guesswork from cooking chicken and fish, and it's one of the most useful basic cooking tools you'll own.
Portion sizing matters throughout the week. If your basket is small (2–3 quarts), halve the portions. A full basket of food is an overcrowded basket.
Troubleshooting common problems and food safety basics
Most air-fryer problems have a simple fix once you know what to look for.
Food looks pale and undercooked: The temperature is too low, the cook time is too short, or the basket was overcrowded. Add 2–3 minutes, increase the temperature by 25°F, or split into a smaller batch.
Outside is browned but inside is raw: The temperature is too high. Lower it by 25°F and extend the time. This is especially common with thick chicken pieces.
Food is soggy: Almost always a spacing problem. Overcrowding traps steam. Cook in a single layer, pat food dry before oiling, and increase the temperature slightly.
Unit is smoking: Check the drip tray for grease buildup, reduce temperature for high-fat foods, and confirm you're not using aerosol cooking spray.
Food safety temperature reminders: The USDA sets minimum safe internal temperatures for common proteins. Chicken and turkey reach safe temperature at 165°F. Pork and fish are safe at 145°F, with a 3-minute rest for pork. Ground beef is safe at 160°F. Always verify with an instant-read thermometer, not by color alone. A chicken thigh can look fully cooked at 155°F and still be unsafe.
These aren't suggestions. Undercooked poultry is one of the most common causes of foodborne illness at home, and an air fryer's fast cook times make it easy to pull food too early. The thermometer is the only reliable check.
Why starting small is the smartest move you can make
Here's what most air-fryer guides don't say plainly: the appliance doesn't make you a better cook. The practice does.
An air fryer is a genuinely useful tool, but beginners who buy one expecting it to simplify cooking without any learning curve often end up frustrated after a few pale, soggy batches. The unit isn't the problem. Skipping the fundamentals is.
The 7-day plan in this guide works because it sequences the learning. You're not just making dinner. You're calibrating your specific model, building the shake-and-check habit, and learning what "done" looks like for each food category before you try anything ambitious. That's the same approach AdultingintheKitchen uses across all its beginner resources: start with one skill, repeat it until it's automatic, then layer the next one on top.
The beginners who get confident fastest aren't the ones who try the most recipes in week one. They're the ones who cook the same five foods well before moving on.
Ready for guided recipes and real chef support?
Knowing the basics gets you started. Having a structured plan with new recipes every week, a grocery checklist, and a real chef available when something goes wrong is what keeps you cooking.

AdultingintheKitchen is built for exactly where you are right now: past the drive-thru habit, not yet confident in the kitchen. The Starter Pack gives you a curated kitchen setup guide, a grocery checklist, and five new beginner recipes every week, each written with the kind of specific detail that actually prevents mistakes. When you hit a snag, real chef support is there by email. No searching forums, no guessing.
If the 7-day plan in this guide felt like the right pace for you, the membership picks up exactly where it leaves off. Start with the Adulting in the Kitchen Starter Pack and cook your first real home meal this week.
Sources
The guidance in this article draws on testing-kitchen and extension-service resources, including the University of Maine Cooperative Extension's Air Fryer 101, T-fal's beginner air fryer guide, Better Homes & Gardens on oil use and crispiness, Tom's Guide's essential tips for new owners, and Real Simple's oven-to-air-fryer conversion guidance. KitchenAid's overview of how air fryers work and Simply Recipes' first-timer's guide are also worth bookmarking.
Always check your model's manual for capacity limits, preset temperatures, and cleaning instructions specific to your unit. Manufacturer guidance overrides general advice when the two differ.
- How to Use an Air Fryer for Beginners | Step-by-Step with T-fal
- Air Fryer 101 - Cooperative Extension: Food & Health - University of Maine Cooperative Extension
- How to Use an Air Fryer for Tasty, Crispy (And Healthy!) Foods
- How to use your new air fryer: 7 essential tips for beginners — Tom's Guide
- How to use an air fryer — RealSimple