If it goes into the oven as batter, dough, or a wet mixture, you bake it. If it goes in already holding its shape, like a chicken, a squash, or a rack of carrots, you roast it. That's the real distinction, and it comes down to two things: what the food looks like before it hits the heat, and what temperature you're using to change it.
You'll master this faster than you think, because the rules are simpler than most recipe blogs make them sound. Here's what to lock in right now, before we get into the details:
- Structure decides the method. No structure yet (batter, dough) means bake. Already structured (meat, whole vegetables) means roast.
- Temperature confirms it. Baking usually stays at 375°F or below; roasting typically runs 400°F and up to drive browning.
- Setup follows the goal. Bake in a centered rack, often covered; roast uncovered, usually with some oil, to let dry heat do its work on the surface.
Get those three rules into muscle memory, and you'll stop guessing every time a recipe says "roast" when you would've reached for "bake."
Key Takeaways
Structure determines the method: unshaped foods like batter and dough get baked, already-solid foods like meat and whole vegetables get roasted.
| Point | Details |
|---|---|
| Structure decides the method | Batter or dough with no shape yet means bake; already-solid food means roast. |
| Temperature confirms the choice | Baking stays at 375°F or below; roasting typically starts at 400°F and climbs. |
| Setup follows the goal | Roast uncovered for browning; cover casseroles and dense bakes early, then uncover to finish. |
| Trust temperature over labels | Oven "bake" and "roast" buttons vary by manufacturer, so rely on actual heat and airflow. |
| Check doneness, don't guess | Use an instant-read thermometer rather than relying on the timer alone. |
| Build the skill with structured practice | AdultingintheKitchen's weekly recipe drops pair baking and roasting techniques so beginners practice both. |
Table of Contents
- Baking Vs Roasting: What Baking Actually Does to Food
- Baking Vs Roasting: What Roasting Actually Does to Food
- Bake Vs Roast Temperature and Setup, Side by Side
- How to Choose Between Roasting and Baking for Common Foods
- Oven Settings, Technique Notes, and Why They Matter
- Common Beginner Mistakes and Quick Fixes
- Practice Plan and Beginner Tools Checklist
- Why This Distinction Matters More Than Recipe Wording Ever Will
- Practice These Skills With Weekly Guidance From AdultingintheKitchen
- Sources
Baking Vs Roasting: What Baking Actually Does to Food
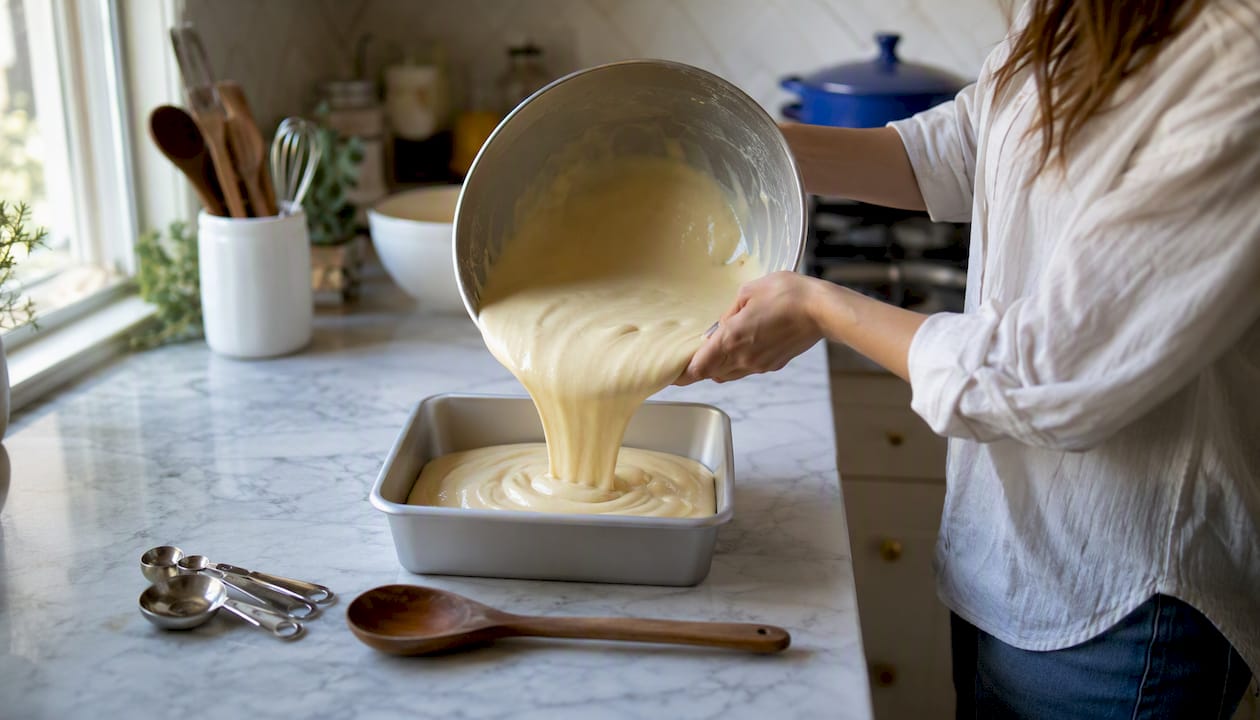
Baking takes something without structure and gives it one. Cake batter goes in as a liquid and comes out as a sliceable solid. Bread dough rises and sets into a loaf. A casserole binds loose ingredients into something you can serve in squares. That transformation, from formless to firm, is the whole point of baking, and it's why the technique works at gentler heat than roasting needs.
Most baked goods live in a tight temperature band. According to University of Florida's food science extension, baking generally happens at 375°F or less, which gives heat time to move through the middle of a cake or casserole without scorching the outside before the center sets. Push the temperature too high, and you get a burnt top with a raw center. That's the tradeoff baking is built around: patience over intensity.
Pan and cover choices matter more in baking than most beginners realize. A cake needs even, gentle heat from all sides, so it usually sits on a center rack in an uncovered pan. A casserole with a lot of moisture often gets a foil cover for the first stretch of cooking time to trap steam and keep it from drying out, then goes uncovered near the end to brown the top. Bread falls somewhere in between: uncovered on a rack or stone so the crust can form.
Foods you'll bake on a regular basis include:
- Cakes, cupcakes, and quick breads
- Yeast breads and rolls
- Pies, tarts, and cobblers
- Casseroles and gratins
- Cookies and bars
Statistic Callout: Baking sits at 375°F or below, a band chosen specifically so batter and dough have time to set through the middle before the exterior overcooks.
Baking Vs Roasting: What Roasting Actually Does to Food
Roasting starts with food that already has a shape and uses higher heat to change its surface, not its structure. A whole chicken goes in whole and comes out whole, just browned, crisped, and cooked through. Carrots go in as carrots. The goal isn't transformation the way it is with batter. The goal is flavor development on the outside while the inside cooks to a safe, tender finish.
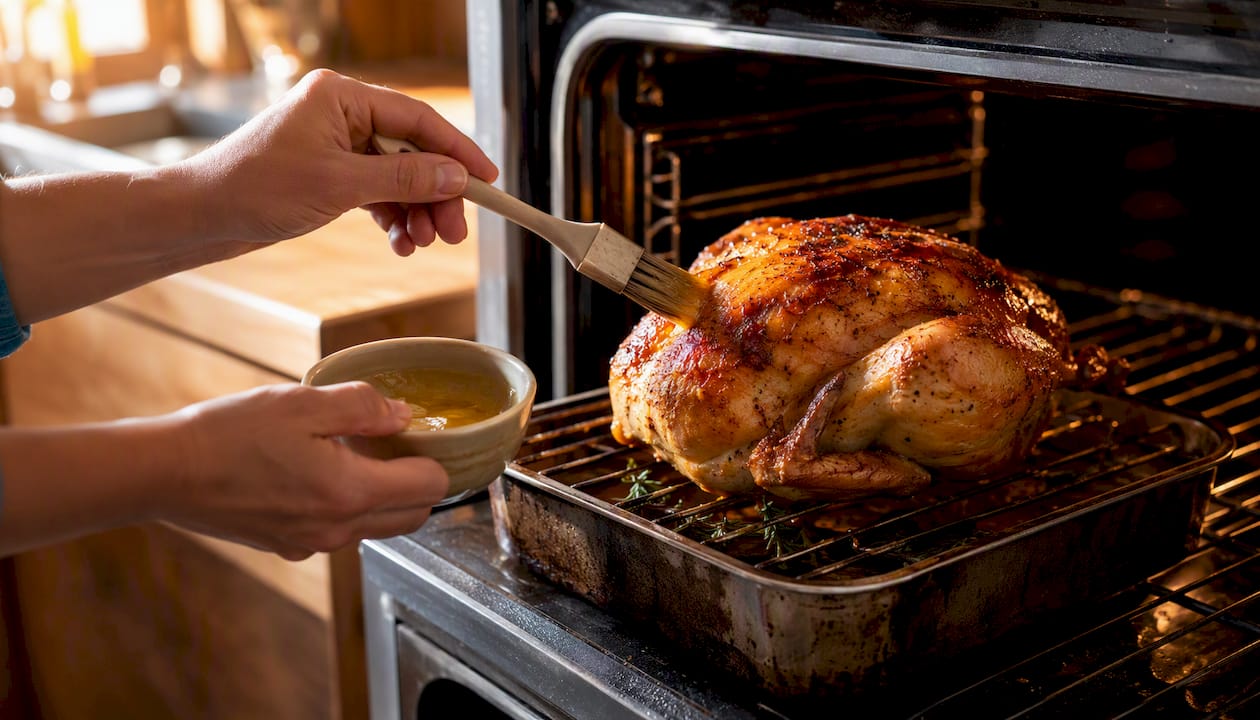
That's why roasting runs hotter. KitchenAid's product guidance puts roasting at roughly 400°F and up, uncovered, specifically to trigger browning and caramelization on the surface of meats and vegetables. Higher heat means faster moisture evaporation at the surface, and that's exactly what you want when you're trying to get crackly chicken skin or blistered brussels sprouts instead of a pale, steamed version of the same food.
Two chemical reactions are doing the heavy lifting here. Caramelization browns the natural sugars in vegetables, while the Maillard reaction is what turns the surface of meat golden brown and gives it that savory, roasted flavor you can't get any other way, according to The Spruce Eats. Both need real heat and dry air to happen, which is exactly what a hot, uncovered roasting pan provides.
Fat plays a bigger role in roasting than it does in baking. A light coat of oil on vegetables or a chicken helps conduct heat evenly across the surface and encourages that crisp, browned exterior. Foods you'll roast most often include:
- Whole chickens and turkey
- Beef roasts, pork loins, and lamb
- Root vegetables (carrots, potatoes, parsnips)
- Whole squash, cauliflower, and brussels sprouts
- Fish fillets and whole fish
Statistic Callout: Roasting generally starts at 400°F and climbs from there, a heat level chosen to brown the surface fast while dry air keeps the exterior from steaming instead of crisping. Curious how far that technique can take you? Our guide on how to roast food like a pro walks through the full process.
Bake Vs Roast Temperature and Setup, Side by Side
Once you can picture both methods next to each other, choosing gets almost automatic. Here's the quick-reference version:
| Dimension | Baking | Roasting |
|---|---|---|
| Typical temperature range | Up to 375°F | 400°F and above |
| Typical foods | Cakes, breads, casseroles, pies | Whole poultry, meat cuts, root vegetables |
| Goal / outcome | Structural set (liquid or dough becomes solid) | Browning and caramelization on an already-solid food |
| Pan / setup | Rack centered, often covered early in cooking | Rack or roasting pan, usually uncovered |
| Fat use | Minimal, built into the batter or dough | Oil or natural fat coating the surface |
| Oven setting | Conventional bake, gentle convection if used | Convection roast or broil finish for extra crisping |
| Timing | Longer, lower heat, steady pace | Shorter, hotter, faster surface change |
When you're scanning a new recipe and it doesn't tell you which method to use, check the ingredient list first. Batter or dough anywhere in the mix points you toward the left column. A whole cut of meat or an intact vegetable points you right. The temperature listed in the recipe usually confirms which side you're on, since a 350°F instruction and a 425°F instruction are rarely doing the same job.
How to Choose Between Roasting and Baking for Common Foods
Three questions settle almost every decision. Does the food have structure before it goes in the oven? What temperature does the recipe call for? And what texture are you after, soft and cohesive, or browned and crisp? Once you've answered those, apply them to what's actually in your kitchen this week.
Chicken. A whole chicken gets roasted at 425°F to 450°F on a rack set over a pan, which lets hot air circulate underneath and crisp the skin evenly. Bone-in chicken pieces roast well too, usually at 400°F to 425°F on a sheet pan, skin side up, uncovered. Boneless chicken breast can go either way depending on whether it's part of a casserole (bake, around 375°F, covered until near the end) or standing alone on a pan (roast, uncovered, around 400°F).
Vegetables. Whole vegetables like a butternut squash or a head of cauliflower roast best around 400°F to 425°F, uncovered, tossed lightly in oil. Cut vegetables like diced carrots or sliced zucchini roast faster, in 20 to 30 minutes at the same temperature range, spread in a single layer so they brown instead of steam. If you're testing this method for the first time, our beginner's guide to roasting food walks through cut sizes and timing in more depth.
Potatoes. A whole baked potato goes in the oven uncovered at 400°F to 425°F for about an hour, skin pricked so steam can escape. Cut into wedges and tossed in oil, those same potatoes become roasted wedges at the same temperature, just faster, usually 30 to 40 minutes, flipped once halfway through.
Fish. Fillets roast quickly, around 400°F for 12 to 15 minutes depending on thickness, on a lightly oiled sheet pan. A whole fish takes a bit longer and benefits from a slightly lower roast, around 375°F to 400°F, so the inside cooks through before the skin burns.
Casseroles and gratins. These bake, not roast, because the mixture needs to set. Cover with foil at 350°F to 375°F for most of the cook time, then uncover for the last 10 to 15 minutes to brown the top.
Oven Settings, Technique Notes, and Why They Matter
Here's something most beginners get wrong: they trust the button labeled "roast" or "bake" more than they trust the actual temperature and airflow. Oven manufacturers don't standardize these settings the same way across brands, and recipe writers use "bake" and "roast" somewhat interchangeably depending on regional habit, according to Martha Stewart's kitchen guidance. The label on your control panel is a shortcut, not a guarantee.
Convection bake typically uses gentler airflow, better suited to cakes, cookies, and other items where you don't want the fan disturbing a delicate rise. Convection roast usually kicks on both the top and bottom heating elements along with a faster fan, which is why it's the better pick for poultry and vegetables when you want extra crisping. Convection speeds up browning across the board because moving air strips moisture from the food's surface faster than still air does, per The Spruce Eats.
Rack placement changes outcomes more than people expect. Center racks give the most even heat, which is what baking wants. A rack set higher, closer to the top element, browns faster, which helps when you're roasting and want a crisp exterior. Sheet pans work fine for most roasting; a roasting pan with a raised rack is worth owning if you cook whole birds or large roasts often, since it lets air circulate underneath instead of trapping steam against the bottom of the meat.
Always preheat. Skipping preheat means your food starts cooking in a cooler oven than the recipe assumes, which throws off both timing and browning. Oil helps conduct heat evenly on roasted vegetables and meat; butter browns faster and adds flavor but burns more easily at high roasting temperatures, so it's often better added partway through rather than at the start. And don't crowd the pan. Vegetables piled on top of each other steam instead of roast, because there's no room for moisture to escape.
Pro Tip: For a large roast, like a whole turkey or a big beef roast, start at a high heat around 450°F for the first 20 to 30 minutes to brown the exterior, then drop the oven to 325°F to 350°F to finish cooking the interior evenly. This two-stage approach, used by professional kitchens, keeps the outside from burning while the inside catches up.
Common Beginner Mistakes and Quick Fixes
Most oven mistakes trace back to a handful of repeat offenders, and every one of them has a simple fix once you know what's happening.
- Crowding the pan → Spread food into a single layer with space between pieces, or roast in two batches instead of one packed tray.
- Skipping the preheat → Wait for the oven to fully reach temperature before food goes in, even if it costs you ten extra minutes.
- Using the wrong pan → Match the pan to the method: sheet pan or rack for roasting, covered dish or cake pan for baking.
- Too much moisture in the pan → Pat meat and vegetables dry before roasting, since excess surface water steams the food instead of browning it.
- Relying only on the clock → Check doneness with an instant-read thermometer or a toothpick test rather than trusting the timer alone, since ovens run hot or cool by as much as 25 degrees from their display.
If your roasted vegetables come out soft and pale instead of browned and crisp, the usual cause is overcrowding or too low a temperature. Spread them out and bump the heat to 425°F. If a cake sinks in the middle, the oven likely wasn't fully preheated or the door got opened too early, letting heat escape before the structure had time to set.
Timing on a recipe card is always an estimate, not a promise. Oven calibration varies, pan material affects heat transfer, and the size of your cut of meat or vegetable changes how fast heat reaches the center. Build the habit of checking for doneness with a thermometer or visual cues rather than pulling food the second the timer goes off.
Practice Plan and Beginner Tools Checklist
You don't need a culinary degree to get consistent results. You need three practice sessions and a handful of the right tools.
Session one: roast a tray of vegetables. Toss cut carrots, potatoes, and onions in oil, spread them in a single layer on a sheet pan, and roast at 425°F for 25 to 30 minutes. Watch for browning at the edges, that's the caramelization doing its job.
Session two: roast chicken pieces. Bone-in thighs and drumsticks, skin side up, oiled and seasoned, roasted at 425°F for 35 to 40 minutes. Check for 165°F internal temperature at the thickest part.
Session three: bake something simple. A basic loaf of quick bread or a casserole teaches you what "set" looks and feels like when it's done, since baked goods firm up rather than brown the way roasted foods do. If you want a few more ideas to rotate through while you practice, sheet pan dinners are a low-stress way to run both methods in the same week.
Here's what belongs in your kitchen before you start:
- Instant-read thermometer to confirm internal temperature instead of guessing
- Rimmed sheet pan for roasting vegetables and chicken pieces
- Roasting pan with a rack for whole birds and larger cuts
- Oven mitts rated for high heat, since roasting temperatures run hotter than most baking
- Wire cooling rack to keep baked goods from getting soggy on the bottom as they cool
Pro Tip: Buy the thermometer before anything else on this list. Guessing doneness by time alone is the single biggest reason beginners either undercook meat or dry it out. A $10 instant-read thermometer solves both problems in one move.
Why This Distinction Matters More Than Recipe Wording Ever Will
I've watched a lot of beginner cooks get tangled up trying to memorize which specific foods "count" as baked versus roasted, when the actual skill is recognizing structure and temperature on sight. Once you can look at a recipe and immediately know whether you're setting a batter or browning a surface, you stop needing the label at all. That's the real skill, not vocabulary.
The bigger issue I see is beginners trusting the oven's button over their own eyes. A "roast" setting on one oven behaves differently than the "roast" setting on another, and recipe writers aren't consistent with the terms either. What actually works is knowing your temperature, your rack position, and what texture you're chasing, then adjusting from there instead of hoping the machine's label does the thinking for you.
This is exactly the kind of judgment that builds real kitchen confidence, and it's the same judgment we help members build session by session inside AdultingintheKitchen, one recipe drop at a time.
Practice These Skills With Weekly Guidance From AdultingintheKitchen
Reading about oven temperatures gets you halfway there. Actually building the habit of checking doneness, adjusting rack position, and knowing when to reach for a roasting pan instead of a casserole dish takes repetition, and that's exactly what a structured membership gives you that a one-time article can't.
AdultingintheKitchen's Starter Pack is built for exactly this stage: beginners who understand the theory and need real practice with real support. Every week, you get five new recipes designed to build on the skills you just learned, including plenty that put baking and roasting side by side so the difference sticks. Real chef support means when your roasted chicken comes out with soggy skin or your bake sinks in the middle, you have someone to ask instead of guessing.
Here's what's inside:
- A kitchen starter pack that gets your tools and pantry set up right from the start
- Weekly recipe drops that alternate between baking and roasting techniques so you build both skill sets
- Grocery checklists that take the guesswork out of shopping for each week's recipes
If you're ready to stop second-guessing your oven, check out the membership options and get your first week's recipes started.
Sources
- FCS3362/FY1501: Dry Heat: Baking, Roasting, and Broiling
- Understand How Baking and Roasting Differ
- How Roasting Is Different From Baking—and Why It Matters