Most grocery stores put fresh whole foods on the perimeter and pantry staples in the center aisles, which means the fastest way to shop for home-cooked meals is to work the outside ring first. Produce, meat and seafood, the deli, the bakery, and dairy live along the walls. Grains, canned goods, spices, and household items fill the interior aisles. Shopping the perimeter first gets your meal-building staples into the cart before you're tempted by the snack aisle, and organizing your list by these sections helps you shop faster and eat better.
Here's the four-step approach that works in almost any store:
- Check your kitchen first. Look in the fridge, freezer, and pantry before you leave so you're not buying a third jar of cumin.
- Pick a few recipes for the week. This gives your list a purpose instead of a random assortment of items.
- Build your list by section, not by memory. Group produce, proteins, dairy, pantry, and frozen items together.
- Follow one direction through the store. Perimeter first, then a single sweep through the aisles you need.
Store layout research shows that block placement and department adjacency directly shape shopper paths and impulse purchases, so the route you choose isn't just about speed. It's about what ends up in your cart.
Key Takeaways
A perimeter-first shopping route paired with a recipe-based, aisle-organized list is the fastest and most reliable way to shop for home-cooked meals.
| Point | Details |
|---|---|
| Shop the perimeter first | Fresh produce, meat, dairy, and bakery sit along the outer walls in most stores. |
| Build lists from recipes | Pull ingredients from 2 to 3 planned meals instead of shopping from memory. |
| Group by section, not memory | Sorting your list by produce, protein, dairy, pantry, and frozen cuts backtracking down. |
| Watch end caps and eye level | These spots are designed for visibility, not always for the best deal. |
| Use signage to orient fast | A quick scan of overhead signs on arrival saves time in unfamiliar stores. |
Table of Contents
- Grocery Store Layout Basics: Where to Find Everything
- How to Turn 2 to 3 Recipes Into an Aisle-Ordered Grocery List
- Shopping Routes That Save Time and Protect Fresh Food
- Common Grocery Store Layout Types and How to Adapt
- Get Shopping Support From AdultingintheKitchen
- Why Milk Sits in the Back and Snacks Sit at Eye Level
- How Signage Helps You Navigate Faster
- Why End Caps Deserve a Second Look
- Accessibility and Comfort in Store Design
- The Psychology Behind Store Layout and Your Cart
- The Real Skill Isn't the Route, It's the List
- Sources
Grocery Store Layout Basics: Where to Find Everything
Every grocery store organizes around the same basic idea, even if the aisle numbers differ. Fresh, perishable food sits on the outer ring of the building. Shelf-stable goods fill the middle. Once you know this, a new store stops feeling like a maze.
The perimeter is where you'll find:
- Produce: leafy greens, herbs, fruit, and pre-cut vegetables, usually right near the entrance
- Meat and seafood: fresh cuts, ground meat, and often a service counter for custom orders
- Deli and prepared foods: sliced meats, cheeses, and grab-and-go meals
- Bakery: fresh bread, rolls, and doughs, often near produce or meat
- Dairy and refrigerated goods: milk, yogurt, butter, and eggs, typically at the far end of the loop
The center aisles hold the packaged and shelf-stable stuff: grains, canned tomatoes, pasta, jarred sauces, spices, snacks, baking supplies, condiments, and household goods like paper towels and cleaning products.
Frozen and specialty sections usually sit near the back or along one side wall. Expect frozen fruits and vegetables, frozen prepared meals, and ice cream grouped together. Larger stores often tuck an international or bulk foods section into a single aisle rather than scattering it, so if you're hunting for coconut milk or tahini, check one aisle before wandering the whole store.
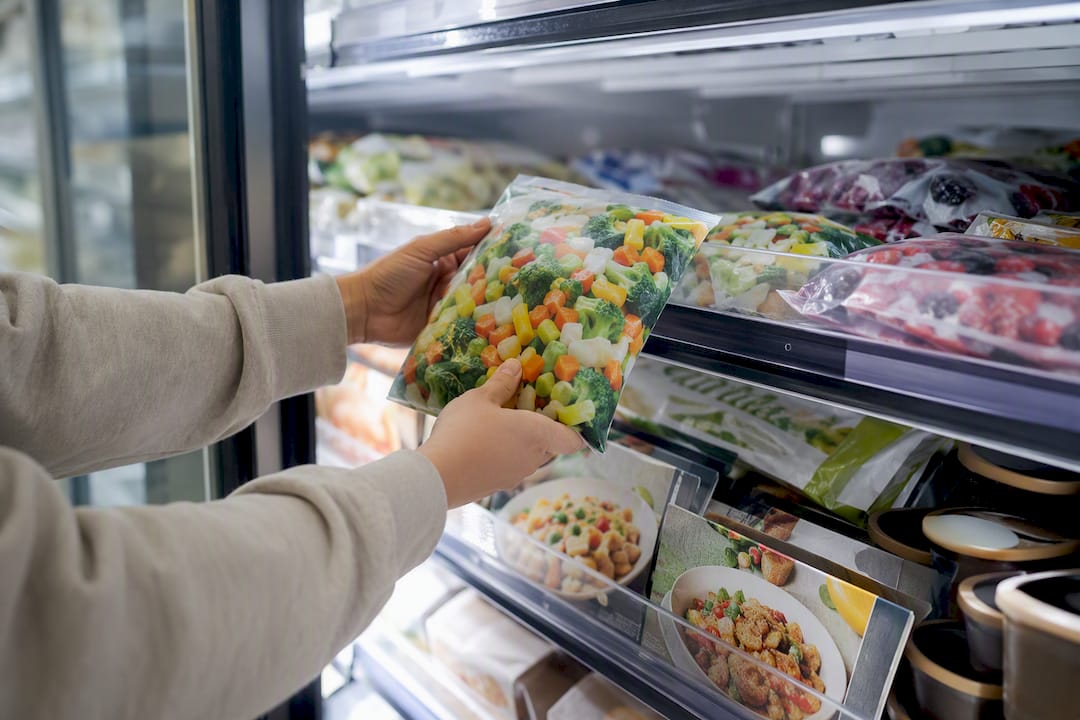
Quick real-world example: if your recipe calls for chicken thighs, garlic, canned diced tomatoes, and parmesan, you'll hit four different zones. Chicken from the meat counter, garlic from produce, tomatoes from a center aisle, and parmesan from dairy. Knowing this ahead of time means you can order your list to match, instead of doubling back.
Pro Tip: Herbs are often split between two spots: fresh herbs in produce and dried herbs in the spice aisle. Check your recipe carefully before assuming you need the fresh version.
How to Turn 2 to 3 Recipes Into an Aisle-Ordered Grocery List
A good grocery list isn't a memory dump. It's a tool built from actual meals, organized to match how the store is laid out. Here's how to build one in four steps.
- Do an inventory check. Open the fridge, freezer, and pantry and note what you already have. This single step prevents the classic beginner mistake of buying a fourth bottle of soy sauce. Our guide to reducing food waste walks through a simple way to track what's on hand.
- Pick your recipes. Two or three meals for the week is plenty for a beginner. More than that and the list gets unwieldy.
- Pull every ingredient and sort by section. Go recipe by recipe, then group everything: produce, proteins, dairy, pantry, frozen, household.
- Choose your format. A printable checklist works well taped to the fridge. A notes app on your phone works if you'd rather not carry paper. Some shoppers prefer the highlighter method, writing everything out and highlighting by color once it's grouped by section.
A sample list for a simple chicken stir-fry and pasta night might look like this:
- Produce: bell peppers, broccoli, garlic, onion
- Proteins: chicken breast, ground beef
- Dairy: parmesan, milk
- Pantry: soy sauce, rice, spaghetti, canned crushed tomatoes
- Frozen: frozen peas
Grouping your list by aisle works like a GPS for the store: it reduces backtracking and keeps you out of aisles you didn't plan to visit. For a ready-made version of this format, AdultingintheKitchen's printable grocery checklist is already sorted by section.
Shopping Routes That Save Time and Protect Fresh Food
The order you walk through a store matters more than most people realize. A good route saves time, and it also protects delicate produce from getting crushed under canned goods.
- Start in produce. This is almost always the first section you hit walking in.
- Move to meat, seafood, and the deli. These sit along the same wall, usually to the left or right of produce.
- Hit the bakery. Often positioned near the entrance or between produce and dairy.
- Finish the perimeter at dairy. This is typically the farthest point from the entrance, which keeps cold items out of your cart the longest.
- Sweep the center aisles for your remaining pantry items.
- Grab frozen goods last, right before checkout, so they don't thaw in the cart.
Some stores use a clockwise loop with one dominant path; others are built as U-shapes where you'll double back through a center aisle to reach the second half of the perimeter. If you only need 10 to 12 items, skip the full loop. Walk straight to the two or three zones you need and check out.
Pack heavy items like canned goods and beverages at the bottom of your cart, with produce and bread on top or in a separate bag, so nothing gets crushed on the way home.
Pro Tip: Early mornings and weekday evenings tend to be less crowded, which means faster checkout lines and less jostling around the produce section.
Common Grocery Store Layout Types and How to Adapt
Not every store is built the same way, but most fall into one of three patterns. Recognizing which one you're standing in helps you pick the fastest route within seconds of walking through the door.
- Grid layout: Straight, parallel aisles running the length of the store. This is the most common design in mid-size and large supermarkets. The best tactic here is simple: follow the aisle numbers in order and group your list to match, since backtracking in a grid wastes real time.
- Racetrack layout: A wide central loop runs around the store's outer edge, often lined with feature displays and seasonal items. This layout is designed to pull you past more products, so stick to your list and treat the loop as a guide, not a suggestion.
- Freeform or market-style layout: Common in smaller specialty stores, with irregular aisle shapes and less predictable organization. Lean on signage here, and don't hesitate to ask staff. This layout style prioritizes browsing over efficiency, which is great for discovery but tougher for a quick trip.
Many stores actually blend elements of grid, racetrack, and freeform designs rather than sticking to one pure model. When you walk into an unfamiliar store, a quick scan of the main aisle and the overhead signs usually tells you which pattern you're dealing with within the first thirty seconds.
Get Shopping Support From AdultingintheKitchen
Reading about grocery store layout is one thing. Actually turning it into a habit is another, and that's exactly where AdultingintheKitchen comes in. The membership is built to take you from "which recipe should I even try" to walking out of the store with exactly what you need and nothing extra.
Here's what membership includes:
- The Adulting in the Kitchen Starter Pack, so your kitchen is set up before your first shopping trip
- Weekly recipe drops with 5 new recipes, giving you the meal-based foundation this whole method depends on
- Grocery store checklists, already organized by section so you can shop the way this guide describes without building a list from scratch
- Real chef support, so you're never guessing alone when a recipe or a substitution trips you up
The method in this guide, recipe first, then aisle-ordered list, then a one-pass route, is exactly what the membership hands you every week. If you want that structure built for you instead of assembled from scratch, check out AdultingintheKitchen and start your next shopping trip with a plan already in hand.
Why Milk Sits in the Back and Snacks Sit at Eye Level
Product placement isn't random. Stores position items with deliberate intent, and knowing the logic helps you shop with your eyes open instead of on autopilot.
Eye-level shelving is prime real estate. Brands pay for it, and stores use it for higher-margin products, name brands, or items they simply want you to notice first. The cheaper store-brand version of the same product is often one shelf up or down, at knee level or above your line of sight. If you're trying to stick to a budget, scanning top and bottom shelves before grabbing the first thing in front of you can save real money over a month of shopping.
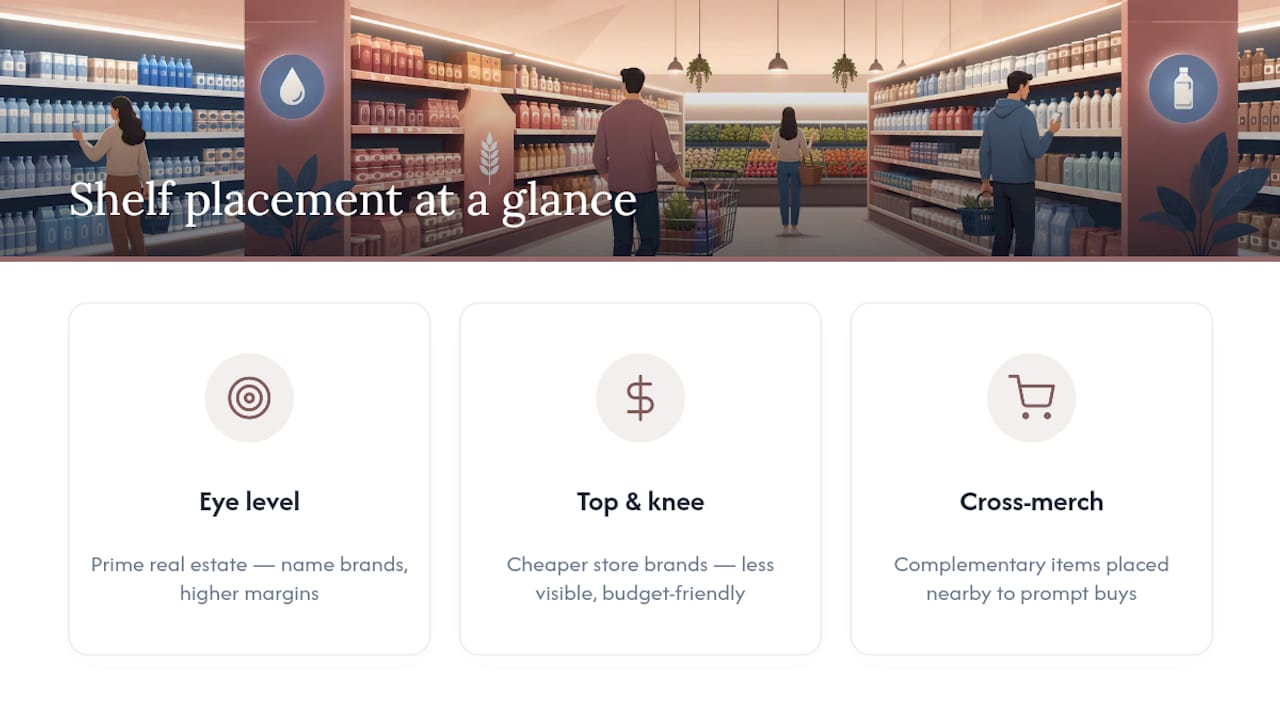
Cross-merchandising is the other major tactic: placing complementary products near each other to suggest a pairing you weren't necessarily planning to buy. Pasta sauce shelved next to a display of fresh pasta. Chips positioned near the beer cooler. Taco shells stacked beside a display of ground beef during a sale. None of this is accidental, and none of it is bad for you as a shopper. It can actually be useful when it reminds you of an ingredient you forgot. The key is noticing when a placement is genuinely helpful versus when it's nudging you toward an unplanned purchase.
How Signage Helps You Navigate Faster
Aisle signs and overhead banners exist for one reason: to get you to what you need without wandering. Well-designed wayfinding systems use overhead category signs and aisle markers so shoppers can find items quickly, and the better the signage, the less time you spend circling back.
The most useful signs tell you the general category, not just a product name, since "Baking" covers flour, sugar, and cake mix in one glance, while "Aisle 7" alone tells you nothing until you've already memorized the store. When you shop a new store for the first time, take thirty seconds to scan the overhead signs before you start grabbing a cart. That quick orientation pass often saves five or ten minutes of backtracking later.
Poor signage, on the other hand, is one of the biggest reasons shopping trips run long. If a store groups items in a way that doesn't match your mental map, like shelving canned coconut milk in the baking aisle instead of the international foods section, signage is your best tool for closing that gap. When in doubt, look up before you look confused.
Why End Caps Deserve a Second Look
End caps, the short shelves at the end of each aisle, are some of the most valuable display space in the entire store. They're highly visible from multiple directions, which makes them the go-to spot for promotional pricing, new product launches, and seasonal items.
Not everything on an end cap is a deal. Some are genuine markdowns worth grabbing, especially for pantry staples you already use regularly. Others are simply high-margin products getting extra visibility because the end cap position guarantees eye contact with nearly every shopper who passes. The difference matters if you're trying to stick to a list: a quick glance at the shelf tag's unit price tells you whether an end cap deal is real or just well-placed.
A practical habit: treat end caps as optional stops, not required ones. If something on display matches an ingredient already on your list, grab it. If it doesn't, keep walking. This single habit does more to protect your budget than almost any other shopping tip, since end caps are specifically positioned to catch shoppers who are moving on autopilot between planned purchases.
Accessibility and Comfort in Store Design
Good grocery store design isn't only about speed and sales. Wider aisles accommodate wheelchairs, walkers, and shoppers pushing a cart with a toddler in the seat. Lower shelving in key sections keeps everyday items reachable without asking for help. Clear, high-contrast signage benefits shoppers with low vision just as much as it helps someone in a hurry.
Comfort matters too, and it shows up in small details: adequate lighting that doesn't wash out produce or create glare, temperature zones that keep dairy and frozen sections cold without making the whole store uncomfortable, and enough space between the meat counter and the surrounding aisle so a line doesn't block the entire walkway. Stores that get this right tend to see steadier customer loyalty simply because shopping there doesn't feel like a physical chore.
If you shop with a stroller, a wheelchair, or simply prefer wider paths, larger supermarkets built on a grid layout usually offer more consistent aisle width than smaller freeform stores, where the layout can narrow unpredictably near specialty sections.
The Psychology Behind Store Layout and Your Cart
Store layout shapes buying behavior in ways most shoppers never consciously notice. The placement of departments, the width of aisles, even the music and lighting all play into decisions made in seconds while standing in front of a shelf.
Perimeter placement of fresh food isn't only about food safety and refrigeration logistics, though that's part of it. It also means every shopper walks past produce, meat, and dairy before reaching the center aisles, which increases the odds you'll pick up more than what's on your list. Layout and adjacency decisions measurably influence which products shoppers are exposed to and ultimately purchase, and impulse buys tend to concentrate in the aisles and end caps positioned along the routes most shoppers naturally walk.
Sticking to a written list is the simplest countermeasure. A list built from planned meals and organized by section reduces both duplicate purchases and impulse detours, because you're moving through the store with a destination in mind instead of browsing. The layout will always be designed to slow you down and show you more. Your list is the tool that keeps you moving with purpose anyway.
The Real Skill Isn't the Route, It's the List
Most advice on grocery store layout treats the store like a puzzle to solve: memorize the aisles, beat the racetrack, outsmart the end caps. That's not wrong, exactly, but it misses the bigger point. The layout doesn't change nearly as much as people think it does. Perimeter fresh food, center pantry aisles, frozen near the back. Once you've seen a handful of stores, you've basically seen the pattern.
What actually determines a fast, cheap, low-stress shopping trip is whether you walked in with a real list built from real meals. A shopper with a recipe-based, aisle-sorted list beats a shopper who's memorized every layout trick in the book but wandered in with nothing written down. The conventional advice spends too much time on store psychology and not enough on the five minutes of prep that happen before you even leave the house.
Start there. Check what's already in your kitchen, pick two or three meals, sort the list by section, then let the layout do the rest of the work for you.
Sources
- The Definitive Guide to Healthy Grocery Shopping
- Grocery Aisles and Wayfinding Systems That Work
- Data-driven approaches to grocery store block layout and shopper path influence