The routine that fixes almost every stainless-steel headache is short: preheat the empty pan, run the water test, add oil, let the food release on its own, then deglaze. That's it. Master that five-step cycle and you'll stop fighting your cookware and start trusting it, the same way pros at brands like All-Clad and Le Creuset do.
Here's your checklist before the burner even clicks on:
- Preheat the empty pan for 2 to 3 minutes on medium.
- Run the water test: a droplet should bead and skate, not evaporate instantly.
- Add oil only after the pan passes the test, then wait until it shimmers.
- Add food, resist the urge to move it, and let it release naturally.
- Deglaze with a splash of liquid to lift anything stuck behind.
AdultingintheKitchen built its beginner curriculum around exactly this cycle, because it's the one habit that makes stainless steel feel less intimidating than cast iron and less finicky than nonstick.
Key Takeaways
Stainless steel cooks reliably when you preheat the empty pan, pass the water test, add oil, let food release, and deglaze every single time.
| Point | Details |
|---|---|
| Follow the 5-step cycle | Preheat, water-test, add oil, cook without forcing releases, then deglaze. |
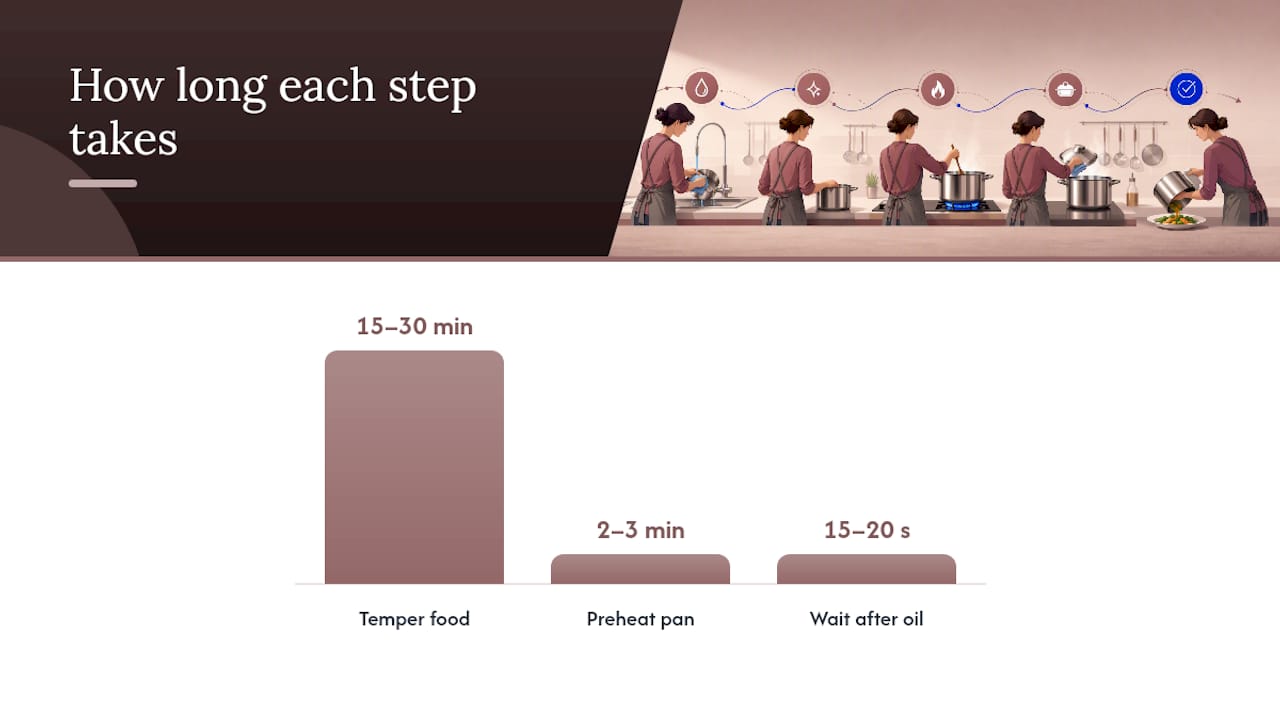
| Temper protein first | Rest food at room temperature for 15 to 30 minutes and pat it dry before it touches the pan. |
| Match oil to heat | Use high smoke-point oils for searing and save butter or olive oil for lower heat or finishing. |
| Clean without abrasives | Cool the pan first, then use soap, baking soda, or Bar Keepers Friend instead of steel wool. |
| Practice with AdultingintheKitchen | The membership's weekly recipes and chef support help you repeat this routine until it's automatic. |
Table of Contents
- The 6-Step Stainless Steel Routine You'll Repeat Every Time
- What the Water Test Actually Tells You About Heat
- Quick Tweaks for Eggs, Fish, Steak, and Vegetables
- How to Clean Stainless Steel Without Ruining It
- Why Stainless Steel Doesn't 'Season' Like Cast Iron
- Why Food Stuck and How to Fix It Right Now
- Frequently Asked Questions
- Sources
The 6-Step Stainless Steel Routine You'll Repeat Every Time
Cooking with stainless steel comes down to sequence. Skip a step and you'll fight sticking. Follow it in order and the pan does the work for you.
- Temper the food. Pull proteins out of the fridge 15 to 30 minutes before cooking and pat them dry with a paper towel. Cold, wet food is the number one cause of sticking.
- Preheat the empty pan. Medium heat, 2 to 3 minutes, no oil yet.
- Run the water test. Flick in a few drops of water. If they bead up and glide around the surface instead of sizzling away, the pan is ready.
- Add the oil. Pour it in after the water test passes, then give it 15 to 20 seconds. It should shimmer and move loosely, not smoke.
- Add the food and wait. Don't nudge it, don't flip it early. Let it sear until it releases on its own, usually when a proper crust has formed.
- Deglaze. Once the food is out, splash in wine, stock, or even water and scrape the browned bits loose with a wooden spoon. That's your pan sauce.
Tramontina's guide to cooking with stainless steel frames this exact sequence as the difference between a pan that fights you and one that cooperates.
Pro Tip: Set a timer for the tempering step. Twenty minutes of patience before the pan even turns on prevents ninety percent of the sticking complaints beginners bring to us.
What the Water Test Actually Tells You About Heat
That beading water droplet isn't a kitchen myth. It's a real physical signal called the Leidenfrost effect: once the pan surface hits a specific temperature, a droplet forms a cushion of vapor underneath itself and skates across the metal instead of flattening out and boiling off. When you see that happen, the pan has crossed into its functional nonstick window.
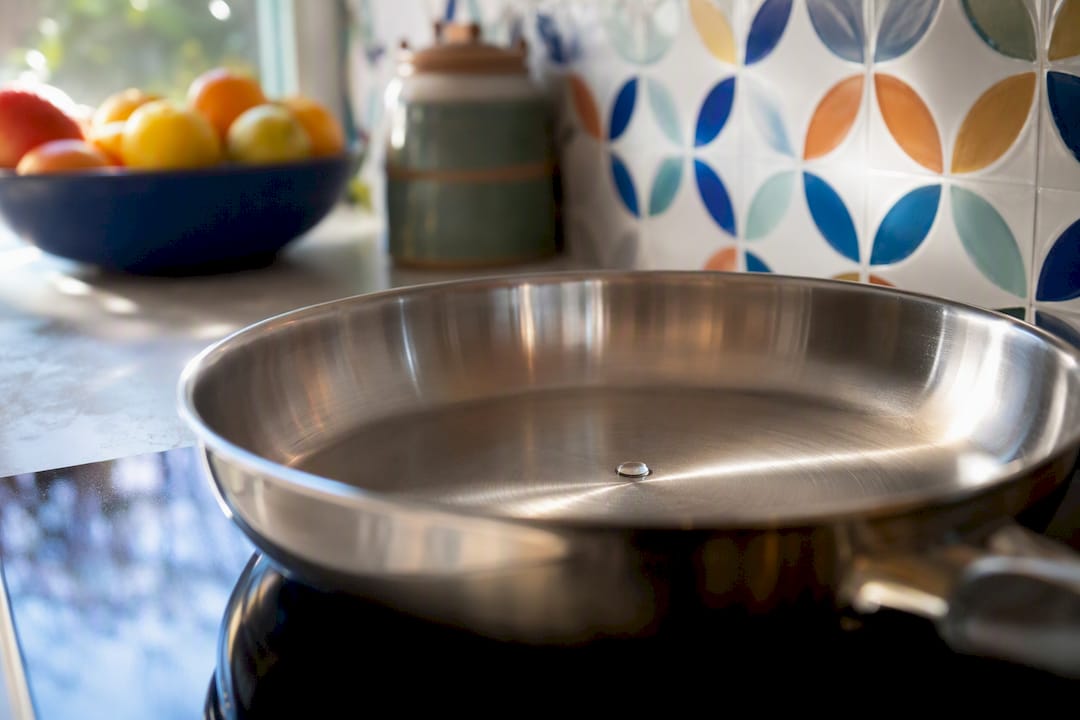
Tramontina pegs that sweet spot at roughly 350 to 375°F (176 to 190°C), which lines up with most stovetop dial settings between medium and medium-high.
Oil choice matters just as much as heat. A few quick rules:
- Use high smoke-point oils, avocado, refined canola, or grapeseed, for medium-high searing.
- Save butter and extra-virgin olive oil for lower heat or for finishing a dish off the burner, since they scorch fast.
- Never pour oil into a cold pan. It seeps into the microscopic pores of the metal instead of forming a clean, even layer.
Quick Tweaks for Eggs, Fish, Steak, and Vegetables
Stainless steel handles almost everything, but each food has its own quirk.
- Eggs: Preheat, water-test, and use more fat than you think you need, at least a tablespoon of butter or oil. Drop heat slightly right after adding eggs so they set without a rubbery crust.
- Fish: Pat the skin bone-dry, use medium heat instead of medium-high, and wait for the fillet to release cleanly with a thin fish spatula rather than forcing an early flip.
- Steak: Bring it to room temperature first, get the pan properly hot, sear with minimal flipping, and rest it on a cutting board for five minutes after.
- Vegetables: Spread them in a single layer instead of piling them up, and stir or toss every minute or two so every side hits the hot metal.
Pro Tip: If fish keeps tearing when you try to flip it, you're flipping too early. Give it another 30 to 60 seconds and it will let go on its own.
How to Clean Stainless Steel Without Ruining It
Daily maintenance is simple. Let the pan cool completely before it touches water, since a hot pan hitting cold water can warp from thermal shock. Wash with warm soapy water and a soft sponge, then dry it immediately with a towel. Skipping that last step is how you end up with cloudy water spots, a fix Bon Appétit's cleaning guide covers well.
Stuck-on food needs a slightly different approach:
- Simmer water with a drop of dish soap for a few minutes to loosen fond, then wipe clean.
- For scorched spots, make a baking-soda paste and scrub gently with a non-scratch sponge.
- For mineral film or baked-on grease that won't budge, an oxalic-acid cleaner like Bar Keepers Friend restores shine without damaging the finish.
- A quick vinegar simmer also clears out mineral spots if you want extra shine.
What to avoid matters just as much as what to use. All-Clad's care guidance is direct about this: skip steel wool, metal scouring pads, bleach-based cleaners, and aerosol cooking sprays, since all four can permanently damage the surface and make future sticking worse. Dishwashers are usually fine occasionally, but handwashing protects rims and rivets longer. When storing pans, stack them with felt or fabric protectors between layers, and always match pan size to burner size to avoid warping over the long run.
Why Stainless Steel Doesn't 'Season' Like Cast Iron
Most stainless cookware worth buying uses tri-ply or full-clad construction: a stainless-steel exterior, an aluminum core for even heat, and a stainless-steel cooking surface. That aluminum layer is why good pans heat evenly instead of scorching in one spot.
Here's the part beginners get wrong: stainless steel never builds a permanent seasoned layer the way cast iron does. Food Network's guide on making stainless steel nonstick is blunt about it. That nonstick feel you get from a well-heated pan is temporary, created fresh every time you preheat and oil correctly, not something that accumulates over months of cooking.
When buying, look for:
- Fully clad construction (not just a disk on the bottom).
- A riveted stainless handle, not a cheap welded one.
- A flat, heavy base that sits solid on the burner.
- Oven-safe ratings if you plan to finish dishes under a broiler.
- A diameter that actually matches your burner size, so heat doesn't creep up the sides unevenly.
Our basic cooking tools guide walks through what else belongs in a beginner kitchen setup alongside your first stainless pan.
Why Food Stuck and How to Fix It Right Now
If something's welded to the bottom of your pan mid-cook, don't panic and don't scrape it with metal. Add a splash of water, wine, or stock, and let it simmer for a minute. That loosens the fond so you can scrape it free with a wooden spoon, and often turns straight into the base of a sauce.
The usual culprits behind sticking:
- The pan wasn't actually hot enough when the food went in.
- Food was cold, wet, or added before the oil finished shimmering.
- The pan was overcrowded, dropping the surface temperature fast.
- Oil went in before the water test passed.
Before your next attempt, run through this again: water-test the pan, pat food dry, temper proteins for 15 to 30 minutes, and match your oil to the heat you're using. Le Creuset's take on common stainless steel mistakes makes a point worth remembering: some sticking, the browned fond left behind after a good sear, isn't a failure at all. It's concentrated flavor waiting to be deglazed into a sauce.
Why this routine clicks for beginners
I've watched this five-step cycle turn stainless steel from the pan people avoid into the pan people reach for first. The water test is the part that changes everything, because it replaces guesswork with a visible signal you can actually trust. It's the same rhythm we build into AdultingintheKitchen's beginner classes and the Starter Pack: practice the sequence a few times and it stops being a technique you're thinking about and becomes something your hands just do.
Practice This Routine With Real Recipes and Real Support
Reading the steps is one thing. Standing at your stove with a pan that's actually behaving is another, and that gap is exactly what AdultingintheKitchen closes. Instead of guessing your way through fish that tears or eggs that glue themselves to the pan, you get weekly recipe drops built to practice this exact routine, grocery checklists so you show up with the right ingredients, and real chef support when a pan just isn't cooperating.

Membership starts with the Starter Pack, which walks you through kitchen setup and your first few recipes so the preheat, water-test, oil, cook, deglaze cycle becomes second nature fast. If you'd rather browse gear first, the shop has the basics to get your kitchen ready. Either way, the next step is simple: pick a recipe, grab your pan, and run the routine tonight.
Frequently Asked Questions
Does stainless steel ever become truly nonstick? No. It develops a temporary nonstick effect each time you preheat correctly and add oil at the right moment, but it never forms a permanent seasoned layer like cast iron does.
Why does my food stick even when I use oil? The pan likely wasn't hot enough before the oil went in, or the oil was added before the water test passed. Cold or wet food dropped into a lukewarm pan is the most common cause.
Can I put stainless steel pans in the dishwasher? Occasionally, yes, but handwashing with warm soapy water protects the rims, rivets, and finish longer over years of use.
What's the fastest way to remove burnt-on food? Simmer water with a drop of dish soap for a few minutes to loosen it, then scrub gently. For tougher residue, a baking-soda paste or an oxalic-acid cleaner like Bar Keepers Friend works well.
Sources
- Cooking with Stainless Steel: Common mistakes and how to avoid them | Le Creuset
- Care & Use | All-Clad
- How to cook with stainless steel | Tramontina
- How to clean stainless steel cookware so it shines like new | Bon Appétit
- How to Make Stainless Steel Nonstick | Food Network