You can build a two-week dinner stash in a single 3-hour session, even if you've never done this before. This guide gives you 12 freezer meals for beginners, the exact timeline to make them, and the FDA safety rules that keep your food good for months, not days. This plan was built to help your first session actually work.
TL;DR:
- Most freezer meals retain their best quality for three to six months, with soups and stews lasting up to nine months if stored properly.
- Freezer burn caused by air reaching the food's surface is the main reason meals degrade, easily preventable by pressing out excess air and labeling packages.
- A typical beginner session prepares six to eight meals in three hours by grouping ingredients, batch cooking, quick cooling, and efficient packing.
- Undercooking pasta and rice before freezing prevents mushiness, while reheating casseroles or breaded items in the oven or air fryer enhances texture.
- Thawing in the refrigerator or cold water is safest and most effective, whereas countertop thawing significantly increases food safety risks.
Table of Contents
- Starter List: 12 Easy Freezer Meals to Try First
- How to Run Your First Freezer-Cooking Session
- Freezing, Storage and Food-Safety Essentials
- Reheating and Serving Tips That Make Freezer Meals Feel Fresh
- Sample 3-Hour Shopping List and Menu
- Troubleshooting and Common Beginner Mistakes
- How AdultingintheKitchen Supports Beginners
- A Note From Bill
- Try AdultingintheKitchen for Step-by-Step Beginner Support
- Sources
Starter List: 12 Easy Freezer Meals to Try First
Skip the complicated stuff for your first round. The best beginner freezer meals are the ones that basically freeze themselves, no fancy technique required.
- Overnight oats jars. Combine oats, milk, and fruit in jars and freeze flat. Thaw in the fridge overnight and eat cold or warmed. Lasts about 1 to 2 months.
- Breakfast burritos. Scrambled eggs, cheese, and cooked sausage rolled in a tortilla, wrapped in foil. Reheat straight from frozen in the oven at 375°F for 20 minutes. Good for 3 months.
- Freezer pancakes or waffles. Cook a double batch, cool completely, and freeze flat on a sheet before bagging. Toast straight from frozen. Good for up to 2 months.
- Beef or turkey chili. A true dump-and-freeze win. Cool, bag flat, and freeze. Reheat on the stove or in a slow cooker. Holds well for 4 to 6 months.
- Chicken and vegetable soup. Broth-based soups freeze beautifully. Reheat gently on the stove so vegetables don't turn mushy. Good for 3 months.
- Beef stew. Freezes and reheats almost as well as it tastes fresh. Give it 4 to 6 months in the freezer.
- Sheet-pan fajita vegetables and chicken. One pan, minimal chopping, huge payoff. Reheat in a skillet or the oven. Lasts about 3 months.
- Baked ziti or lasagna. A classic beginner casserole. Assemble in a foil pan so it bakes straight from frozen, no transferring dishes required, and give it 30 to 45 extra minutes at 375°F. Good for 3 months.
- Shredded chicken (plain, cooked). This is your multi-use workhorse. Freeze in 2-cup portions and pull it for tacos, soup, or sandwiches all month. Good for 4 months.
- Taco meat. Cook a big batch of seasoned ground beef or turkey and freeze in portions. The Kitchn recommends freezing components like this separately so you can build different meals from the same base instead of eating the same dish twice.
- Black bean and sweet potato enchiladas. A plant-forward option that holds up well frozen. Reheat covered in the oven at 350°F for 30 minutes. Lasts about 3 months.
- Lentil soup. Another plant-forward pick, cheap and filling. Freezes and reheats cleanly on the stove. Good for 3 months.
Notice the pattern: soups, stews, and shredded proteins tolerate freezing far better than delicate dishes. That's not an accident. Foodsafety points to exactly these dump-and-freeze categories as the highest-value wins for busy households, because they need almost no technique to turn out right.
How to Run Your First Freezer-Cooking Session
A focused 3-hour afternoon is enough to fill your freezer without wrecking your whole Saturday. Households that commit to a single session like this commonly walk away with 10 to 15 finished meals, according to Penny Pinchin' Mom, and that stash cuts down hard on impulsive takeout orders.
Before you start, gather your tools: a sheet pan, a large stockpot, gallon freezer bags, a permanent marker, a ladle, and a kitchen scale if you have one. Pick recipes your household already eats regularly rather than experimenting on new dishes. Familiar recipes have a much higher first-try success rate than ambitious new ones.
Here's the timeline that works:
- Hour 1: Prep and chop. Wash, chop, and portion every raw ingredient across all your recipes before you turn on a burner. Group by recipe on your counter or in bowls.
- Hour 2: Cook in batches. Start your longest-cooking item (chili or stew) on the stove first, then work through sheet-pan and skillet items while it simmers. Cook everything to safe internal temperatures, but slightly undercook any pasta.
- Hour 2:30 to 2:45: Cool everything. Spread hot food in shallow pans rather than leaving it in a deep pot. Serious Eats notes this speeds cooling dramatically and helps prevent the ice crystals that cause freezer burn.
- Hour 2:45 to 3: Pack and label. Bag flat, press out air, label with dish name, date, and reheating instructions, then freeze.
Once you've got the rhythm down, a shorter 1-hour meal-prep session can top off your stash between big cooking days.
Freezing, Storage and Food-Safety Essentials
Here's the number that matters most: most freezer meals hold their best quality for 3 to 9 months, according to FDA guidance. Soups and stews sit at the longer end of that range, while casseroles with dairy or delicate vegetables drift toward the shorter end. Freezer burn, not bacteria, is usually what ruins a meal that's been sitting too long. It happens when air reaches the food's surface and pulls out moisture.
A few packing habits prevent that:
- Press all the air out of freezer bags before sealing, or use the bowl-in-a-bag trick, setting a bag inside a bowl to hold it steady while you fill it.
- Leave about half an inch of headspace in rigid containers so liquids can expand without cracking the lid.
- Wrap casseroles in plastic film first, then heavy-duty foil, or use a disposable foil pan you can bake directly from frozen, a tip Moon & Magnolia uses for exactly this reason.
- Label every single package with the dish name, the freeze date, and the reheating method, so you're never guessing at a "mystery meal" six weeks from now, per The Kitchn's labeling advice.
Thawing matters just as much as freezing. The safest method is the refrigerator, which takes about 24 hours for most meals. If you're short on time, seal the bag and submerge it in cold water, changing the water every 30 minutes, or use your microwave's defrost setting if you're cooking the food immediately after. Never thaw on the counter. Bacteria multiply fast once food sits between 40°F and 140°F, which is exactly why NSF flags countertop thawing as unsafe.
Reheating and Serving Tips That Make Freezer Meals Feel Fresh
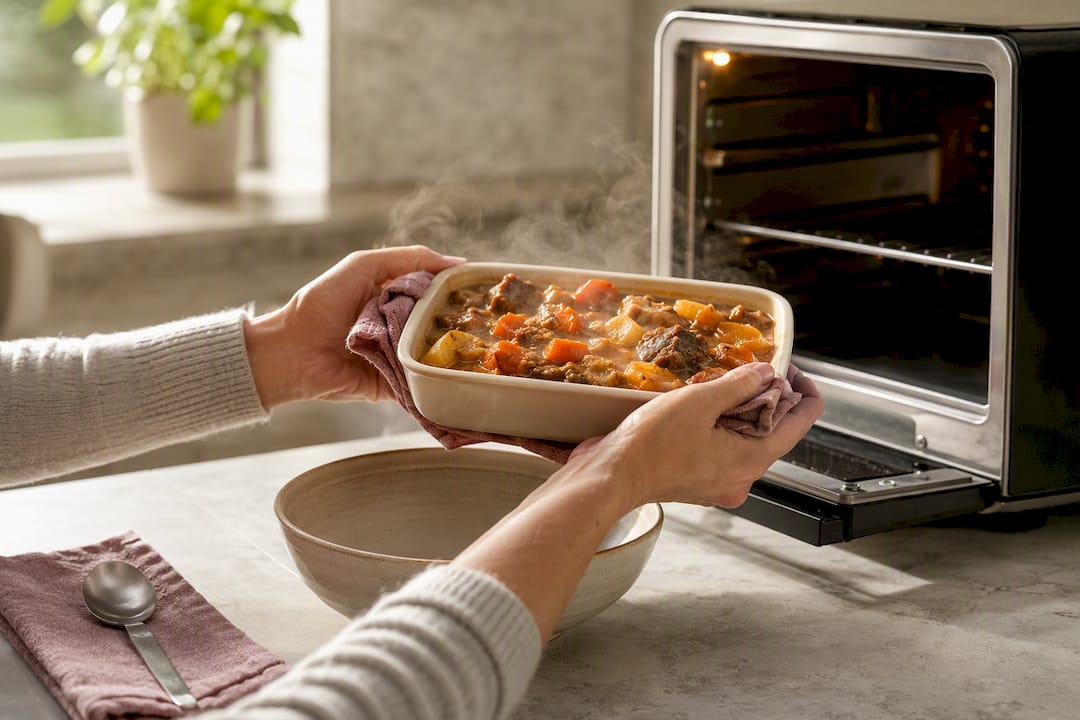
The secret to freezer meals that don't taste like freezer meals is deciding what to freeze before it's fully assembled. Sauces, taco meat, and shredded chicken freeze as components, which means you can pair them with something fresh at serving time instead of eating the same static dish twice. The Kitchn calls this the fix for freezer-meal boredom, and it's the single biggest upgrade a beginner can make.
A few habits make a real difference at the reheating stage:
- Undercook pasta slightly before freezing. It finishes cooking during reheating, and Taste of Home points out that fully cooked pasta usually turns mushy once it's frozen and reheated.
- Re-crisp casserole tops or breaded items in the oven or an air fryer rather than the microwave, which tends to leave everything soft.
- Add something fresh right before serving: a squeeze of lime, chopped herbs, or a handful of quick-cooking frozen vegetables wakes up the whole plate.
- Use the slow cooker for soups and stews straight from frozen on low for 6 to 8 hours, or thaw first and reheat on the stove in 15 minutes.
Pro Tip: Keep a small jar of chopped fresh herbs or a bag of shredded cheese in the fridge specifically for topping freezer meals. That one fresh element does more to fight "reheated food fatigue" than any cooking technique.
Sample 3-Hour Shopping List and Menu
This maps directly to the session plan above and produces roughly 6 to 8 meals.
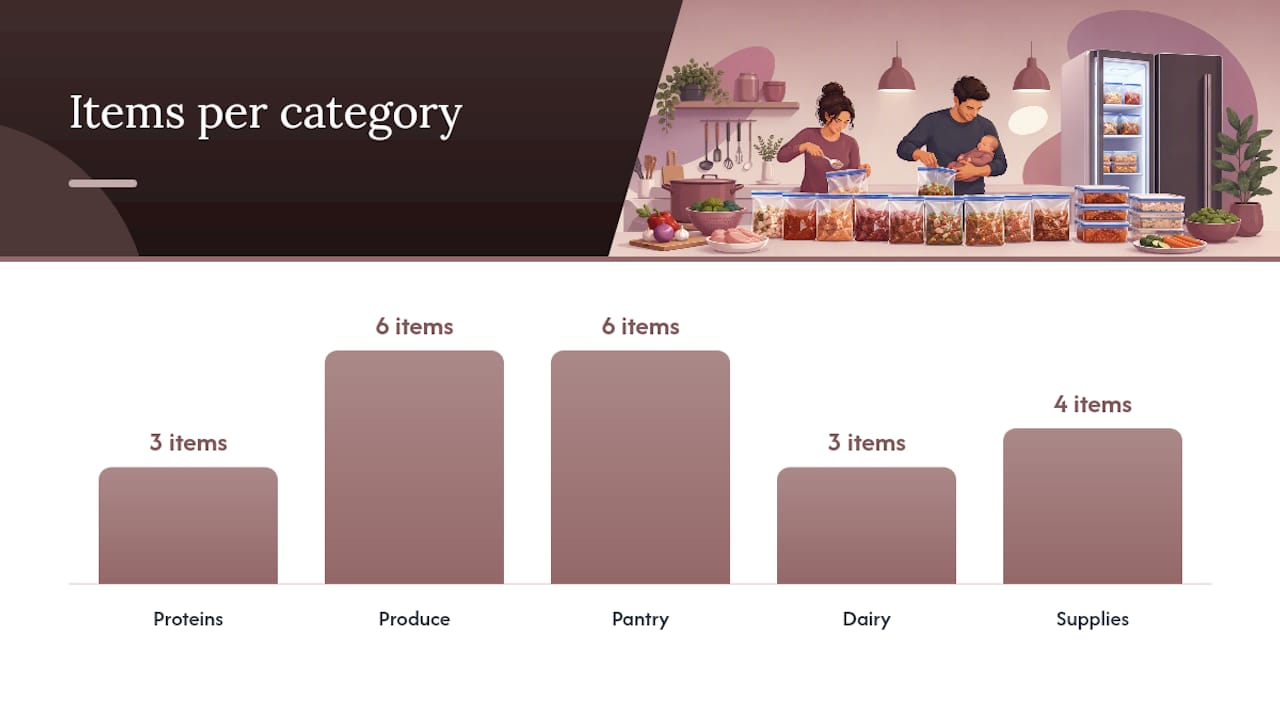
- Proteins: 3 pounds ground beef or turkey (for chili and taco meat), 3 pounds boneless chicken thighs (for shredded chicken and fajitas), 1 dozen eggs.
- Produce: 2 onions, 1 bag bell peppers, 3 sweet potatoes, 2 cans black beans, 1 bag frozen mixed vegetables, fresh cilantro.
- Pantry: 2 cans diced tomatoes, 1 box pasta, 1 bag rice, taco seasoning, chili seasoning, 12 tortillas.
- Dairy: shredded cheese, sour cream, 1 dozen eggs (if not already counted above).
- Supplies: 1 box gallon freezer bags, 1 permanent marker, 2 disposable foil pans, freezer tape or labels.
Sample labels to copy directly: "Beef chili, frozen 3/8, reheat on stove or slow cooker from frozen" and "Baked ziti, frozen 3/8, bake 375°F for 45 minutes from frozen." Specific, boring labels like these save you from opening three bags before dinner just to figure out what's inside. If you want to stretch this list into full weeknight dinners rather than components, cross-reference it against beginner weeknight dinner ideas for inspiration on pairing sides.
If you're prepping around a holiday or a big family gathering, Wild Foodz's timing tips for larger batch sessions are worth a look before you scale this list up.
Troubleshooting and Common Beginner Mistakes
Most freezer-meal failures trace back to one of five habits, and every one of them has an easy fix.
- Skipping the cooling step. Freezing food while it's still hot creates condensation and ice crystals. Spread it in a shallow pan first and let it cool completely.
- Fully cooking pasta or rice before freezing. Both turn mushy on reheating. Undercook by a minute or two so they finish in the oven or on the stove.
- Bad sealing. Air pockets are the number one cause of freezer burn. Press bags flat and squeeze out every bit of air you can before sealing.
- Skipping labels. An unlabeled bag becomes a guessing game in six weeks. Write the dish, date, and reheating method every time.
- Reheating from frozen at too high a temperature. This scorches the outside before the inside thaws. Lower the oven temperature and add time instead.
If a reheated dish turns out watery, simmer it uncovered on the stove for a few minutes to reduce the liquid. If it tastes flat, add salt, acid, or fresh herbs before serving. But if a package smells off, looks discolored, or was left thawing on the counter for more than two hours, throw it out. That's not a texture problem. That's a safety one.
How AdultingintheKitchen Supports Beginners
Reading a plan is one thing. Having someone answer your questions while you're standing in your kitchen holding a bag of frozen chicken is another. That's the gap AdultingintheKitchen was built to close.
Here's what maps directly to everything above:
- A starter pack walks you through setting up your kitchen and stocking the basics, so you're not scrambling for containers mid-session.
- Weekly recipe drops keep your freezer stash from going stale after week two, once you've worked through your first 12.
- Grocery store checklists turn the shopping list in this article into something you can hand to yourself at the store without second-guessing quantities.
- Real-time chef support means you can ask a cooking expert whether that chili looks done, instead of guessing.
If you want to build more freezer-friendly skills from scratch, our easy recipes for beginners guide is a solid next stop, and our about page covers more on how the membership works day to day.
A Note From Bill
Start with 3 or 4 recipes, not 12. Confidence in the kitchen builds from small wins, not marathon sessions. Once you've thawed a meal that actually tastes good, you'll trust yourself to try the next one, and most beginners feel that shift within a month or two of consistent freezer cooking.
— Bill
Try AdultingintheKitchen for Step-by-Step Beginner Support
This membership exists for exactly the moment this article is trying to solve: you've got a plan, but you'd rather not figure out the details alone. The membership pairs weekly recipe drops with grocery checklists and real-time chef support, so instead of Googling "is my chili done" at 6 p.m., you get an answer from someone who actually cooks.
The starter pack helps set up your kitchen the right way before you even touch a freezer bag, and the weekly recipes keep your rotation from going stale once your first batch runs out. If the 3-hour plan above sounds doable but you want backup for the next one, check out the membership and see what your first month of support could look like.