Protect a nonstick pan by using low-to-medium heat, hand-washing with mild soap, and avoiding metal or abrasive tools. Those three habits matter because heat and friction are the two forces that destroy the coating faster than anything else. Skip the dishwasher, never heat the pan empty, and retire it the moment you see peeling or deep scratches. Everything else is detail work.
TL;DR:
- Nonstick pans should be kept below 500°F (260°C) to prevent coating damage and the release of harmful fumes, especially during prolonged cooking.
- Always add oil or butter before heating the pan and avoid heating it while empty to minimize rapid degradation of the coating.
- Hand-washing with mild soap and a soft sponge while the pan is warm extends its lifespan, while dishwasher use and abrasive tools significantly accelerate wear.
- Replacing a pan is necessary if the coating peels, flakes, or deep scratches expose metal, or if the pan warps and heats unevenly, as these issues compromise safety and effectiveness.
- Frequent small habits like stacking with protective layers and using non-metal utensils can prevent mechanical damage that often leads to premature pan failure.
Table of Contents
- Nonstick Pan Care: The Quick Checklist Before and After Every Cook
- The Daily Cleaning Routine That Keeps the Coating Intact
- How to Remove Burned-On or Sticky Residue Without Ruining the Pan
- Cooking Habits That Determine How Long a Nonstick Pan Survives
- Utensils, Storage, and Avoiding Mechanical Damage
- When to Repair a Nonstick Pan and When to Just Replace It
- Why This Guidance Holds Up: What the Experts and Testers Agree On
- The Beginner Mistake Nobody Warns You About
- Ready for Guidance Beyond Just Your Cookware?
- Sources
- FAQ
Nonstick Pan Care: The Quick Checklist Before and After Every Cook
Good nonstick pan care comes down to a short list of habits repeated consistently, not one big trick. Run through this before you turn on the burner and again once dinner's done.
- Never preheat an empty pan. Add oil or butter first, then turn on the heat.
- Hand-wash while the pan is still warm, using mild dish soap and a soft sponge.
- Dry the pan completely before putting it away. Trapped moisture invites residue buildup.
- Skip metal utensils and anything abrasive, including steel wool or scouring pads.
- Skip aerosol cooking spray. It leaves a sticky residue that builds up over time and is genuinely hard to strip off. An oil mister or a measured teaspoon does the job cleaner.
- Let a hot pan cool on its own. Don't run it under cold water straight off the burner.
- If you have to stack pans, slide a towel, paper towel, or felt protector between them.
- Check the surface every few weeks. Flaking or deep scratching means it's time to replace, not repair.
The Daily Cleaning Routine That Keeps the Coating Intact
The single biggest lifespan factor is what happens in the sixty seconds after you finish cooking. Let the pan cool to room temperature first. Nonstick coatings sit on a metal base, and dunking a hot pan into cold water shocks the metal, which can warp the pan and reduce contact with the burner, leading to uneven heating down the road.
Once it's cool, follow this order every time:
- Fill the pan partway with warm water and let it sit for a minute or two if anything is stuck.
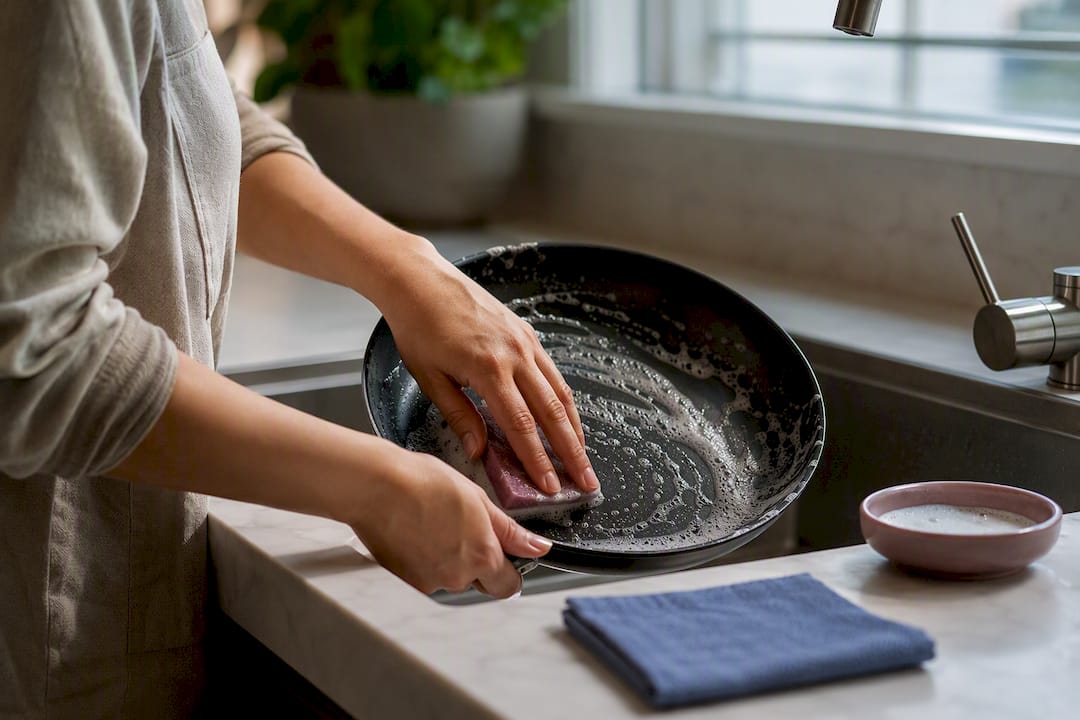
- Wash with mild dish soap and a soft sponge or dishcloth, working in circles rather than scrubbing hard in one spot.
- Rinse thoroughly so no soap film remains, which can turn cloudy under heat next time you cook.
- Dry immediately with a towel instead of air-drying. Standing water encourages residue and can dull the surface over time.
- Do a thirty-second visual check: look at the rivets where the handle attaches, give the handle a wiggle to confirm it's still tight, and glance at the exterior finish for any new dark spots from overheating.
A lot of nonstick pans carry a "dishwasher-safe" label, but safe and smart aren't the same thing. Dishwasher cycles use hot water, high pressure, and harsh detergent, and that combination can degrade the coating and loosen rivets over time, even on cookware rated for it. Reserve the dishwasher for pans that are already near the end of their life.
Pro Tip: Keep a small dedicated sponge just for nonstick cookware. Sponges that have scrubbed cast iron or stainless steel often carry gritty residue that can scratch a nonstick surface without you noticing.
How to Remove Burned-On or Sticky Residue Without Ruining the Pan
Stuck-on food doesn't mean your pan is done for. It usually means it needs a little patience instead of muscle. Start with a soak: fill the pan with warm water and a squeeze of dish soap, and let it sit for 15 to 30 minutes. That alone loosens a surprising amount of buildup.
For anything that survives the soak, reach for baking soda:
- Mix baking soda with a small amount of water until it forms a thick paste.
- Spread the paste over the stuck spots and let it sit for 10 to 30 minutes, depending on how stubborn the residue is.
- Gently scrub with a soft sponge. This method is a practical restoration approach used by manufacturers and testers precisely because it lifts buildup without abrading the coating.
If a pan has scorched oil that won't budge, try deglazing instead: add a splash of water or vinegar to the warm pan and bring it to a gentle simmer, letting the liquid loosen the residue before you wipe it out.
What you should never reach for: steel wool, oven cleaner, bleach, or anything labeled "heavy-duty." These strip the coating faster than the residue itself ever would. If you've tried soaking and baking soda more than once and the pan still won't release food, or if the coating starts flaking during cleaning, that's your answer. Replace it.
Cooking Habits That Determine How Long a Nonstick Pan Survives
Heat is the real enemy of nonstick coating, more than any dish soap or sponge choice. Keep cooking temperatures below roughly 500°F (260°C), and treat that as a ceiling, not a target. Most stovetop cooking for eggs, pancakes, and delicate proteins happens well under that anyway.
The habit that causes the most damage: heating an empty pan. Nonstick coating can start to break down at high heat with nothing in the pan to absorb it, and overheating can release harmful fumes along with it. Add your oil or butter before the burner goes on, every single time.
Long, acidic simmers are another quiet killer. A tomato sauce that cooks for an hour in a nonstick skillet exposes the coating to sustained heat and acidity at once, which wears it down faster than a quick sear ever would. Save the sauce work for stainless steel or an enameled pot.
Before you slide any nonstick pan into the oven, check the manufacturer's temperature limit. Plenty of nonstick cookware tops out well below what a cast iron skillet can handle, and exceeding it voids both the coating and often the warranty.
Nonstick pans are built for a specific job: eggs, pancakes, crepes, delicate fish, and anything that would otherwise weld itself to a hot surface. For searing steak or getting a hard crust on chicken thighs, stainless steel or cast iron handles the heat better and won't degrade from it. Matching the pan to the cooking temperature it's actually built for is one of the simplest ways to stretch its life.
Utensils, Storage, and Avoiding Mechanical Damage
Scratches don't usually come from one dramatic mistake. They come from small daily habits that add up over months. The fix is mostly about swapping tools, not changing technique.
- Cook with silicone, wood, or heat-safe plastic utensils instead of metal, which can gouge the coating even with light pressure.
- Never scrape at a sharp angle to loosen stuck food. Flip the technique: soak it loose instead of scraping it off.
- Ditch the metal spatula for flipping delicate items, too. A silicone one flexes just enough to slide underneath without digging in.
- If cabinet space forces you to stack pans, slide a folded towel, paper towel, or a felt pan protector between each one.
- Store the pan with nothing heavy resting on top of it, since compressed weight over time can dent the coating even without direct scraping.
- Clean the exterior with a soft cloth and mild cleanser, too. Baked-on grease on the outside can eventually affect heat distribution.
Simple swaps like these matter more than any cleaning trick, because a silicone spatula, an oil mister, and a soft pan protector prevent damage that's often impossible to undo once it happens. Stock your drawer with the right basic tools once, and you'll rarely think about it again.
When to Repair a Nonstick Pan and When to Just Replace It
Some wear is cosmetic. Some wear is a safety issue. Knowing the difference saves you from either tossing a perfectly good pan too early or cooking on one you shouldn't.
Replace the pan if you see any of the following: peeling or flaking coating, deep scratches that expose the metal underneath, or food that sticks persistently even after a proper wash and a baking soda treatment. Consumer testing labs are consistent on this point. Heavy scratching, visible peeling, or a permanent loss of nonstick performance means the pan has crossed from worn to unsafe, and no amount of restoration will bring it back.
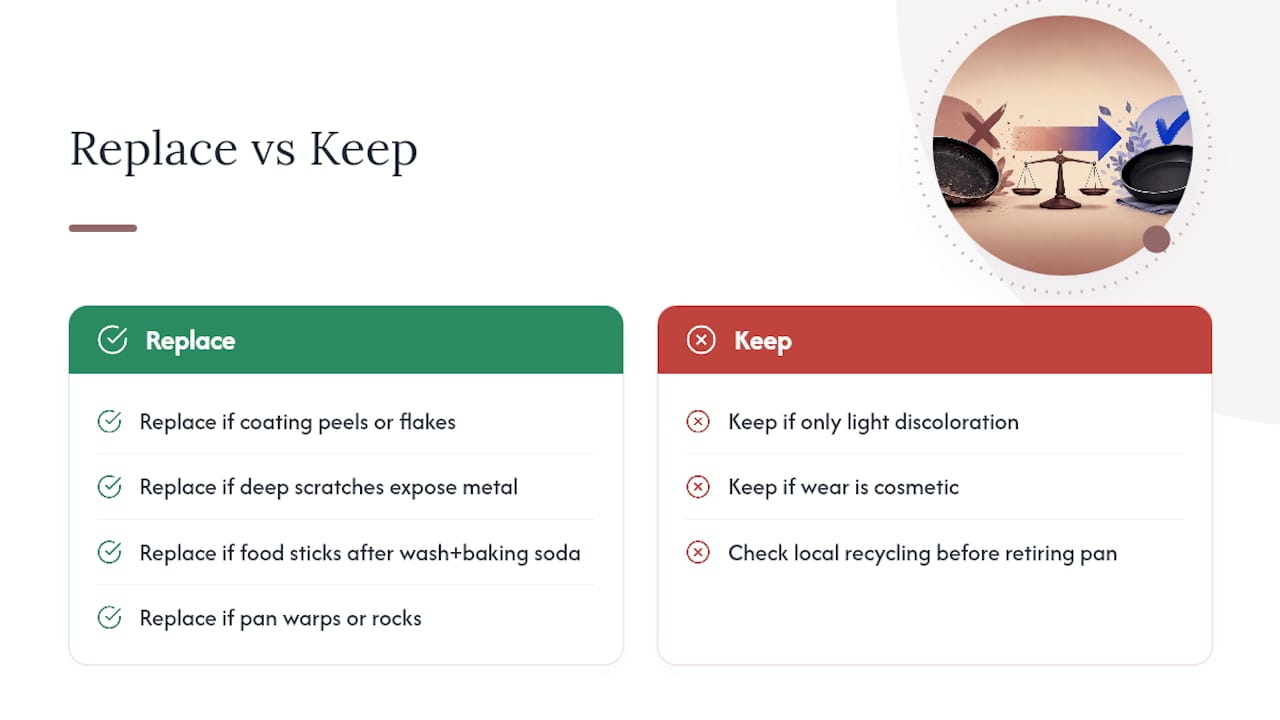
Warping is another clear signal. If the pan rocks on the burner or heats unevenly, no cooking technique will fix that.
Light discoloration or a duller finish, on the other hand, is usually cosmetic and not a reason to throw the pan out. The trigger is structural, not aesthetic. Once you do retire a pan, check with your local recycling program, since most nonstick coatings aren't accepted in standard curbside metal recycling and need separate handling.
Why This Guidance Holds Up: What the Experts and Testers Agree On
This guidance leans on the same sources professional test kitchens use, including Consumer Reports product testing, BBC Good Food expert guidance, and Serious Eats kitchen reporting. Every one of them lands on the same conclusion: hand-washing and moderate heat beat any fancy cleaning product.
Manufacturers back this up, too. Overheating and dishwasher use are common reasons warranty claims get denied, since both count as user misuse rather than a defect. Testing labs agree that proactive maintenance, cleaning after each use, preventing burned oil buildup, and avoiding overheating is what separates a pan that lasts years from one that's trashed in months.
Classroom-style tip: tonight, after dinner, wash your nonstick pan by hand while it's still warm instead of leaving it to soak overnight. That one swap alone prevents most of the residue buildup that leads to scrubbing hard later.
The Beginner Mistake Nobody Warns You About
Most nonstick advice focuses on cleaning, and cleaning genuinely matters. But the habit that quietly ends more pans than any sponge choice is treating nonstick as an all-purpose pan. Beginners reach for it because it's the least intimidating thing in the cabinet, then use it to sear chicken, reduce a sauce for twenty minutes, or preheat it hot and empty out of habit from watching a cooking show. None of those are cleaning failures. They're heat failures, and heat failures happen before you ever pick up a sponge.
The conventional wisdom oversells cleaning products and undersells restraint. A soft sponge and mild soap will only get you so far if the pan spends its life at temperatures it wasn't built for. If you take one thing from all of this, prioritize the heat rule over the cleaning rule. Buy a cheap oven thermometer if your stove runs hot, keep a stainless pan nearby for anything that needs a real sear, and let the nonstick pan do the one job it's actually good at.
— Bill
Ready for Guidance Beyond Just Your Cookware?
Pan care is one small piece of the bigger puzzle: knowing what to cook, how hot to run your stove, and which tool actually fits the job in front of you. That's exactly the gap AdultingintheKitchen closes for people starting from zero. Instead of guessing your way through kitchen basics one YouTube video at a time, You get a starter pack that helps set up your kitchen, weekly recipe drops with new dishes to build skill, grocery checklists, and chef support when you need it.

That kind of ongoing guidance is what prevents the exact mistakes covered here, like overheating a pan or grabbing the wrong tool, because you're learning technique alongside the gear. If you're ready to stop piecing together advice from scattered articles, check out Adulting in the Kitchen's membership and see what a guided starting point looks like.
Sources
- How to care for non-stick cookware | top tips from experts | Good Food
- How Not to Ruin Your Nonstick Pan - Consumer Reports
- How to clean a nonstick pan | Martha Stewart
- The 6 Bad Habits That Are Destroying Your Nonstick Pans - Serious Eats
FAQ
How do you maintain nonstick pans?
Keep heat low to medium, always add oil before turning on the burner, and hand-wash with mild soap and a soft sponge after every use. Avoid metal utensils, cooking spray, and the dishwasher, since dishwasher cycles can degrade the coating over time even on pans labeled dishwasher-safe.
How do I care for my nonstick fry pan day to day?
Let it cool before washing, clean it while it's still warm with soap and a soft sponge, and dry it fully before storing. If you stack it with other cookware, put a towel or pan protector between the layers to prevent scratching.
What ruins nonstick pans?
The biggest culprits are overheating, metal utensils, abrasive scrubbers, aerosol cooking spray, and regular dishwasher cycles. Correcting these five habits is usually enough to noticeably extend how long a pan performs well.
How do I make my nonstick pan nonstick again?
Soak the pan in warm soapy water first, then apply a baking soda paste to any greasy buildup and let it sit for 10 to 30 minutes before gently scrubbing. If the pan still sticks badly after that or the coating is visibly flaking, it has reached the end of its usable life and needs replacing rather than restoring.
What temperature is too hot for a nonstick pan?
Most manufacturers recommend staying below roughly 500°F (260°C), and cooking at lower heat settings covers the vast majority of what nonstick pans are meant for anyway. Check your specific pan's guidance before using it in the oven, since oven-safe limits vary by brand and coating type.